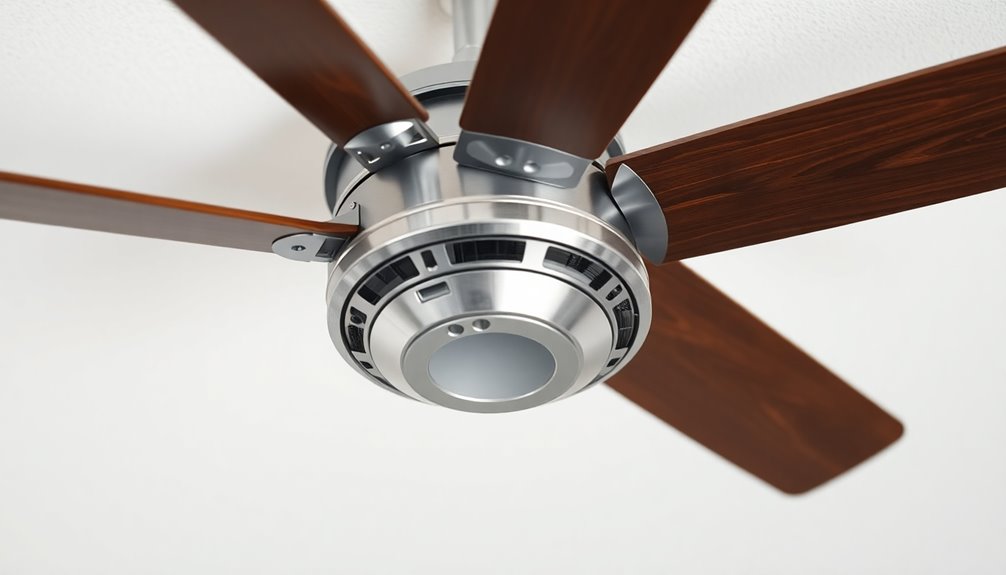
Mounting a ceiling fan takes a few simple steps to guarantee safety and proper function. Start by selecting a fan rated for your ceiling type and height. Turn off power and inspect the electrical box, guaranteeing it's securely fastened and rated for fan use. Install the mounting bracket to the box, then connect the fan's wiring according to color codes. After that, attach the blades and any light kit. Finally, restore power and check for smooth operation and proper clearance from the ceiling. There's much more to explore on guaranteeing your fan runs safely and efficiently.
Key Takeaways
- Ensure the electrical box is fan-rated and securely fastened to a ceiling joist to support the fan's weight and vibrations.
- Secure the mounting bracket to the ceiling's junction box according to the manufacturer's instructions for stability.
- Thread the ceiling fan's main wires through the mounting bracket, matching wiring colors with household wiring for proper connections.
- Attach the fan blades to the motor, ensuring correct orientation to maximize airflow and secure all screws tightly.
- Conduct a final inspection, ensuring adequate clearance from the ceiling and walls, and test the fan's operation for stability and noise.
Types of Ceiling Fans

When it comes to ceiling fans, you'll find several types designed to suit different needs and spaces.
Standard fans usually have blade spans ranging from 29 to 56 inches, making them perfect for most average-sized rooms. If you've got a lower ceiling, consider a low-profile fan, also known as a flush mount fan, which sits directly against the ceiling to maximize headroom.
For outdoor areas like patios, outdoor fans are your best bet, as they're built to withstand moisture and various weather conditions.
If energy efficiency is a priority, look for Energy Star-certified fans, which can cut your energy bills by up to 50% when used properly.
When selecting your fan, keep size recommendations in mind. You can determine the right size by dividing the room's square footage by four; a 50-inch fan is ideal for a 200-square-foot room.
Also, make sure you have appropriate mounting hardware, such as a ceiling fan box or a fan-rated electrical box, especially if you're replacing an existing light fixture. This helps guarantee safe and effective installation.
Preparing for Installation

Before you start installing your ceiling fan, make certain to measure the room size to choose the right fan for ideal airflow.
Check that your electrical box is fan-rated to safely support the fan's weight and vibrations.
Don't forget to turn off the power and use a voltage tester to confirm safety during the installation process.
Room Size Considerations
How do you choose the right ceiling fan for your space? First, consider your room size. To determine the appropriate ceiling fan size, divide the room size in square feet by four. For example, a 200 sq ft room typically requires a fan with a 50-inch blade span.
Standard ceiling fans generally range from 29 to 56 inches, making them suitable for most average-sized rooms.
Next, think about your ceiling height. If your ceilings are less than 8 feet high, low-profile fans, or hugger fans, are your best bet. These fans guarantee safe clearance while maximizing air circulation.
For larger spaces, especially those over 400 sq ft, you might need to use multiple fans or opt for larger models to enhance air circulation effectively.
It's also essential to mount your ceiling fans at least 7 feet above the floor to guarantee ideal airflow and prevent safety hazards.
Electrical Box Inspection
Prior to installing your ceiling fan, it's vital to inspect the electrical box to confirm it can support the fan's weight. Standard light fixture boxes often lack the necessary strength for heavier fans, so look for visible markings that indicate compliance with safety standards. This verifies the box is rated for fan support.
Additionally, check that the electrical box is securely fastened to a ceiling joist or brace. This stability prevents any movement or instability once the fan is installed.
During your inspection, be on the lookout for signs of wear or damage. Compromised integrity in the electrical box can pose safety risks, meaning you might need a replacement.
If you discover that your current electrical box isn't suitable for the added weight and vibration of a ceiling fan, it's important to replace it with a fan-rated box. These boxes are specifically designed to handle the demands of ceiling fans, assuring both safety and performance.
Taking the time to conduct a thorough inspection allows you to proceed confidently with your installation, knowing your fan will be securely mounted.
Safety Precautions Checklist
A thorough safety precautions checklist is essential when preparing for your ceiling fan installation. Start by guaranteeing your safety and compliance with local electrical codes. Here's a concise checklist to follow:
| Step | Action | Tools/Equipment |
|---|---|---|
| 1. Turn Off Power | Shut off power at the circuit breaker. | Circuit breaker, voltage tester |
| 2. Verify Power is Off | Use a voltage tester to confirm. | Voltage tester |
| 3. Check Ceiling Box | Guarantee the ceiling box is rated for ceiling fans. | Ceiling box |
| 4. Use a Sturdy Ladder | Set up a sturdy ladder and maintain three points of contact. | Sturdy ladder |
| 5. Wear Protective Gear | Put on safety goggles to protect your eyes. | Safety goggles |
| 6. Follow Instructions | Adhere to the manufacturer's safety instructions. | Manufacturer's safety instructions |
Removing Existing Fixtures

Before diving into the installation of your new ceiling fan, you'll need to safely remove any existing fixtures. Start by turning off the power supply at the circuit breaker to prevent electrical shock.
Once that's done, grab a ladder to access the old fixture. For easier disassembly, remove any light bulbs and shades.
Next, unscrew and detach the fixture from the ceiling, making sure to support it to avoid dropping and damaging it. As you're doing this, inspect the wiring for any damage or wear.
If you're not installing a new fan immediately, cap off the wires with wire nuts for safety.
Consider taking a photo of the wiring setup before you disconnect anything; this'll be a handy reference when you install your new ceiling fan.
By following these steps, you'll guarantee that removing existing fixtures is both efficient and safe, paving the way for a smooth installation process ahead.
Installing the Junction Box

When you're installing the junction box, make certain it meets the electrical box specifications for ceiling fans.
You'll need to verify it's securely mounted and can handle the fan's weight and vibrations.
Don't forget to check the wiring and follow safety guidelines to keep everything compliant and safe.
Electrical Box Specifications
To guarantee a ceiling fan operates safely and efficiently, you need to use a junction box specifically rated for ceiling fan support. This electrical box must withstand the weight and vibrations generated by the fan during operation.
When you install the junction box, make sure it's securely fastened to a ceiling joist or support beam. This is essential for stability, preventing any sagging or wobbling of the fan.
Before installation, inspect your existing electrical box for signs of wear or damage. If it's not fan-rated or can't support the fan's weight, you'll need to replace it with a suitable fan-rated electrical box that complies with local building codes. This guarantees that your ceiling fan is mounted safely and adheres to regulations.
Additionally, the junction box should be positioned at a height that allows for ideal airflow and safety—typically at least 8 inches from the ceiling surface. Proper installation of the junction box can be compared to ensuring color accuracy in projectors, as both contribute significantly to overall performance.
Keeping these specifications in mind will help you create a secure and efficient environment for your ceiling fan, enhancing both its performance and longevity.
Mounting Bracket Installation
How do you guarantee your ceiling fan is securely mounted? First, install a fan-rated junction box to make sure it can support the weight and vibrations of the fan. Standard electrical boxes often don't provide adequate support.
If your existing box isn't properly anchored, use a fan brace or hanger bar to secure the junction box between the ceiling joists.
Next, when you're ready to install the mounting bracket, verify it's level and tightly secured to the junction box with the screws provided in the fan kit. This prevents wobbling during operation and enhances the fan's performance.
It's also essential to confirm that the electrical box is grounded and can handle the electrical load of your ceiling fan. This step is vital for compliance with safety standards.
Finally, don't forget to follow the manufacturer's guidelines for specific mounting bracket installation. Each fan model may have unique requirements, and adhering to these guidelines will guarantee compatibility and safety.
Safety and Support Requirements
Guaranteeing your ceiling fan operates safely and efficiently hinges on proper junction box installation. You need to use a junction box that's rated for ceiling fan support, often marked as "fan-rated." This guarantees it can handle the fan's weight and vibration during operation.
Securely fasten the junction box to a ceiling joist or support beam to prevent any movement or sagging, which could negatively impact the fan's performance.
Position the junction box at least 8 inches from the ceiling to allow for proper clearance and airflow around the fan. If your existing junction box isn't suitable for fan installation, replace it with an expandable ceiling fan hanger bar or a new fan-rated box to provide adequate support.
Always check that the junction box is grounded properly to avoid electrical hazards and to comply with local electrical codes.
Mounting the Bracket

Typically, you'll want to secure the mounting bracket to the ceiling's electrical box with screws, making sure it's level and tightly fastened against the ceiling. This step is essential for providing the necessary weight support for your fans.
Before you proceed, confirm that the electrical box is rated for ceiling fan use; it must handle the weight and vibration generated during operation.
For added stability, consider using a fan brace to anchor the mounting bracket to a ceiling joist, especially in drywall installations. This extra support can prevent any wobbling and guarantee a safer setup.
When positioning the mounting bracket, verify it's centered in the hole cut in the drywall. Doing so won't only help with ideal airflow but also enhance the aesthetic appeal of your fan once it's installed.
Always follow the manufacturer's instructions regarding the installation of the mounting bracket. Each fan model may have specific requirements, so adhering to these guidelines guarantees compatibility and safety.
With the bracket securely mounted, you're one step closer to enjoying the comfort of your ceiling fan.
Wiring the Ceiling Fan

Wiring a ceiling fan is an important step that guarantees it operates safely and efficiently. First, verify you've secured the mounting bracket to the ceiling junction box according to the manufacturer's instructions. This alignment provides proper support.
Next, thread the ceiling fan's main wires through the center of the mounting bracket to prepare for the wiring connections.
Now it's time to connect the wires. Match the fan wiring colors to the household wiring: black to black, white to white, and connect the ground wire (green or bare copper) to the ground screw. Use wire nuts to secure these connections, confirming they're tight and safe.
After connecting, neatly tuck the wires into the ceiling junction box, avoiding any exposed wiring.
Before you restore power, double-check all wiring connections for accuracy and security. This step is vital for safe operation.
Once you're confident everything is in order, you can restore power to the existing electrical box. Your ceiling fan is now ready for the next steps, making sure you can enjoy its cooling benefits without worry.
Attaching Blades and Light Kit

After securing the fan to the ceiling, you can move on to attaching the blades and light kit. To attach the fan blades, align each blade bracket with the corresponding holes on the motor and use the provided screws to fasten them. Start all screws before tightening for an even fit. Pay close attention to the orientation of blades, especially if you have a reversible fan, to maximize airflow.
Next, mount the light kit. Feed the light kit wires through the hole in the switch housing cover plate, guaranteeing all connections follow the manufacturer's wiring diagram. Light fixtures typically require additional support, so make sure they're securely fastened to the fan's mounting bracket with the supplied hardware.
Here's a quick reference table:
| Step | Action | Notes |
|---|---|---|
| 1. Attach Blades | Align blade brackets and secure screws | Guarantee screws are tightened |
| 2. Light Kit Wiring | Feed light kit wires through housing | Follow manufacturer's wiring diagram |
| 3. Secure Light Fixtures | Fasten to mounting bracket | Check for exposed wires |
After completing these steps, double-check that all screws are tightened to prevent any safety hazards during operation.
Final Checks and Testing

Once you've completed the installation, it's important to conduct final checks and testing to guarantee everything operates smoothly.
Start by restoring power at the circuit breaker. Use the wall switch or remote control to test the fan's operation. Observe it for several minutes, listening for any unusual noises or noticing any wobbling that could indicate improper installation.
Next, make certain all screws and connections are securely tightened. Pay special attention to the blade brackets and light kit components, as loose parts can detach during operation.
Confirm that the fan blades have adequate clearance from the ceiling and walls; they should be at least 8 inches from the ceiling and 30 inches from the walls to promote ideal air circulation.
Finally, conduct a thorough final inspection. Tuck away any exposed wiring and check that all components are assembled according to the manufacturer's instructions.
This final step is vital for both safety and performance. By confirming everything is correctly installed and functioning, you'll enjoy the benefits of your ceiling fan for years to come.
Frequently Asked Questions
What Holds a Ceiling Fan to the Ceiling?
A ceiling fan's securely attached mounting bracket holds it to the ceiling. This bracket connects to a fan-rated electrical box, which must support the fan's weight and vibrations.
You'll need to fasten the bracket to a ceiling joist using screws, ensuring it's level to prevent wobbling. Sometimes, a fan brace adds extra support, especially when the electrical box isn't directly attached to a joist, giving you a stable installation.
Are Ceiling Fans Attached to Joists?
Yes, ceiling fans are typically attached to joists.
When you install a fan, you need to secure it to the ceiling joist or a fan-rated electrical box to guarantee stability.
It's essential to locate the joist accurately, as this helps prevent wobbling or detachment during operation.
If you can't find a joist where you want to mount the fan, you can use an expandable hanger bar for proper support.
How Is a Ceiling Fan Hung?
To hang a ceiling fan, you start by securing a mounting bracket to a fan-rated electrical box attached to a ceiling joist.
Make sure the fan's blades are 7 to 10 feet above the floor for safety. Center the fan in the room, allowing 1.5 feet of clearance from walls.
If your ceiling is angled, use a downrod to achieve the correct angle.
Finally, connect the wiring and tighten all screws to eliminate wobbling.
How Ceiling Fans Are Installed?
When you install a ceiling fan, start by securing a mounting bracket to a fan-rated electrical box anchored to a ceiling joist.
Next, connect the fan's wiring using wire nuts, matching colors for safety.
Hang the fan assembly from the bracket for easier blade attachment.
Once everything's secured, attach the blades and light kits as per the manufacturer's instructions.
Finally, restore power and test the fan to verify it runs smoothly.
Conclusion
To sum up, mounting a ceiling fan isn't just a task; it's a dance of precision and patience. By following these steps, you'll not only enhance your room's comfort but also add a stylish touch to your space. Once you've secured everything and flipped the switch, you'll feel the revitalizing breeze and know your hard work paid off. So roll up your sleeves, embrace the challenge, and enjoy the cool rewards that come from your efforts!
