You can definitely replace a light fixture with a ceiling fan, but you need to follow certain steps for safety and proper installation. First, check your electrical box to verify it can support the fan's weight. Next, make sure the wiring is compatible, as ceiling fans require specific connections. Turn off the power before starting to avoid shocks, and gather the necessary tools like screwdrivers and a voltage tester. Finally, follow the manufacturer's instructions carefully. There's more to the installation process that can help guarantee everything goes smoothly.
Key Takeaways
- Yes, you can replace a light fixture with a ceiling fan, but ensure the existing electrical box supports the fan's weight.
- Verify that the electrical wiring is compatible with the fan's requirements, typically needing 50-60 watts.
- Install a mounting bracket securely to the electrical box, ensuring it is fastened to ceiling joists for stability.
- Turn off the power at the breaker box and use a voltage tester to prevent electrical shock during installation.
- Consult a licensed electrician if unsure about wiring safety or compliance with local electrical codes.
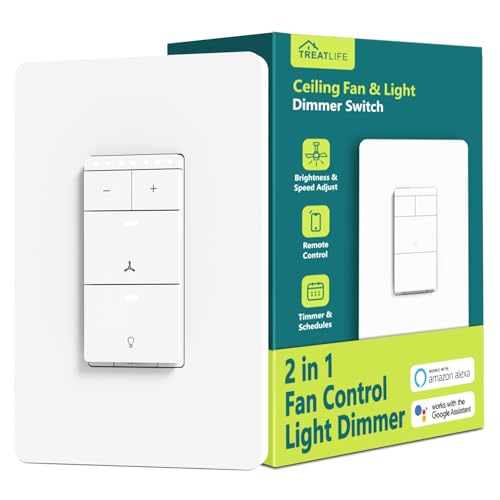
Smart Ceiling Fan Control and Dimmer Light Switch, Neutral Wire Needed, TREATLIFE 2.4Ghz Single Pole Wi-Fi Fan and Light Switch Combo, Works with Alexa, Google Home and SmartThings, Remote Control
Note: Designed for stable 2.4GHz Wi-Fi connections only (5GHz not supported). No hub required. A neutral wire is...
As an affiliate, we earn on qualifying purchases.
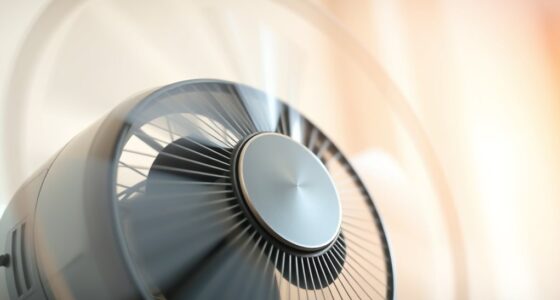
Ceiling Fan Installation Overview

When you're ready to replace a light fixture with a ceiling fan, it's important to start with a clear understanding of the installation process.
First, check if your existing electrical box can support the fan's weight and size. If not, you may need to install a new support box or brace kit for stability. Proper support is essential to prevent wobbling or vibrations, which can compromise safety and functionality.
Next, verify the electrical wiring is compatible with the ceiling fan's power requirements, typically needing 50-60 watts for the fan alone and extra wattage for any light kits.
During installation, connect the fan's electrical wires: black for the fan, blue for the light, and white for neutral. Don't forget to secure the ground wire for safety.
Always follow the manufacturer's instructions. If you encounter outdated wiring or have safety concerns, consulting a professional is advisable. Additionally, ensuring that your ceiling fan is energy-efficient can lead to long-term energy savings on your utility bills.

Kasa Smart Ceiling Fan Control & Dimmer Switch | Adjustable 4-Speed Fan & Brightness Control | Works w/Apple HomeKit, Alexa & Google Home | 2.4G Wi-Fi Only, Single Pole, Neutral Wire Required | KS240
【4 Fan Speeds】 Tailor your airflow to your exact preferences by choosing from four fan speeds for the...
As an affiliate, we earn on qualifying purchases.
Assessing Electrical Box Support

Often, homeowners overlook the importance of properly evaluating the electrical box support before installing a ceiling fan. You need to verify that your existing electrical box is rated to handle the weight of the fan, as standard light fixture boxes often aren't sufficient. A good rule of thumb is to aim for a safety factor of 10:1, meaning the support should manage at least ten times the fan's weight. Additionally, ensuring that your electrical box is properly supported can help prevent potential refrigerant leaks that could affect home comfort.
If you find that your current electrical box isn't properly supported, consider using a ceiling fan brace kit or installing a two-by-four or two-by-six beam between ceiling joists for added stability.
Ceiling fans typically require a dedicated ceiling box designed specifically for their weight and operational vibrations. This is essential to prevent wobbling and guarantee safe operation. Additionally, using a properly supported electrical box can enhance energy efficiency in your home, leading to reduced energy costs over time.
Finally, always consult local electrical codes and guidelines when evaluating or modifying electrical box support for your ceiling fan installation. This helps you stay compliant and safe, giving you peace of mind as you enjoy your new fan.
Taking these steps won't only enhance safety but also improve the longevity and performance of your ceiling fan.

53T Universal Ceiling Fan Wall Remote Control, 3 Speed, Light Dimmer, 4-DIP Switch Compatible with Hampton Bay, Harbor Breeze, Hunter (Wall Remote Only)
Universal Compatibility: This wall remote control is designed to work seamlessly with most ceiling fan models,compatible with most...
As an affiliate, we earn on qualifying purchases.
Wiring Compatibility and Requirements

How can you guarantee your wiring is up to the task when replacing a light fixture with a ceiling fan? First, check that your existing wiring meets the power requirements of the fan, which typically needs 50-60 watts.
You'll want to verify the wiring configuration includes a green ground wire, a white common wire, a black wire for the fan, and possibly a blue wire for the light. Properly connecting these wires is vital for a successful installation.
If your home has older wiring from the 1920s, it mightn't be suitable for use with a ceiling fan and may need complete replacement. A ground wire is essential, as its presence indicates potential updates to the wiring, enhancing safety.
Meanwhile, common neutral wiring can pose safety risks if not configured correctly. Always refer to the manufacturer's instructions for specific wiring compatibility and requirements.
If you have any doubts, consult with a licensed electrician to verify your wiring is safe and compliant before proceeding. Taking these steps guarantees a smooth changeover from a light fixture to a ceiling fan while prioritizing safety and functionality.

Universal Ceiling Fan Remote Control Kit, Wall Remote Switch with Light Dimmer and 3 Speeds, Replacement for Hunter Hampton Bay Harbor Breeze, Include Wall Switch, Remote Control and Receiver
Multi-Functions --- There are 4 separate buttons for ceiling fan: The LIGHT button control light's on/off and brightness,...
As an affiliate, we earn on qualifying purchases.
Safety Precautions for Installation

Before you start installing your ceiling fan, make sure to turn off the power at the breaker box to avoid any risk of electrical shock.
Don't forget to wear protective gear, like gloves and safety glasses, to keep yourself safe during the process.
Finally, always verify that the wires aren't live with a voltage tester before you begin working on them.
Turn Off Power
Safety is paramount when replacing a light fixture with a ceiling fan. The first step is to turn off power at the circuit breaker. This simple action can prevent electrical shock and guarantee a secure installation.
Before you start working, make sure to:
- Locate the appropriate breaker box for your home's electrical system.
- Flip the switch to the "off" position for the specific circuit.
- Use a voltage tester to confirm that the power is indeed off.
- Keep the breaker box closed to avoid accidental turning back on.
It's essential to verify that the circuit breaker remains off throughout the installation process. This not only protects you from potential hazards but also keeps your workspace safe.
Remember, if you're ever uncertain about any electrical connections or the installation process, don't hesitate to consult a professional electrician. Their expertise can help you navigate any complexities and guarantee compliance with local codes.
Use Protective Gear
When installing a ceiling fan, wearing the right protective gear is essential for your safety and comfort. Start by putting on safety glasses to shield your eyes from dust and debris that can fly around during the installation.
You'll also want to use insulated gloves; these will help prevent electrical shock while you're handling wires and making connections.
Before you engage in the installation, double-check that all power to the circuit is turned off at the breaker box. This step is vital to avoid any accidental electrocution while you work on replacing the light fixture with your new fan.
Make sure you have a sturdy ladder ready—one that can safely support your weight and give you easy access to the ceiling fan area without causing strain.
Finally, keep a first aid kit nearby. Even with all your precautions, accidents can happen, and having a first aid kit can be a lifesaver for minor injuries.
Verify Electrical Compatibility
After gearing up for the installation, you need to verify the electrical compatibility of your setup. This step is vital to guarantee a safe and successful ceiling fan installation.
Start by checking the existing light box; it must be rated to support the weight and vibration of a ceiling fan, as standard light boxes often aren't adequate.
Here's what you should look for:
- Wiring compatibility: Verify your wiring can handle the ceiling fan's power requirements, usually around 50-60 watts.
- Ground wire presence: Check for a ground wire, essential for safety. If you see outdated wiring like knob-and-tube, consult an electrician.
- Circuit-breaker box: Inspect for any recent upgrades that suggest your wiring is up to code for a ceiling fan.
- Power off: Always turn off the power at the circuit breaker before starting any electrical work to prevent shocks.
Tools Needed for Installation

When you're ready to replace your light fixture with a ceiling fan, having the right tools makes all the difference.
You'll need essential installation tools like screwdrivers and wire cutters, along with safety equipment to protect yourself during the process.
Familiarizing yourself with wiring and connection tools will guarantee a smooth installation.
Essential Installation Tools
Replacing a light fixture with a ceiling fan requires a few essential tools to guarantee a smooth installation process. You'll want to gather the following items before getting started:
- Screwdriver: For securing the ceiling fan and electrical box.
- Drill: To make holes for mounting and to drive screws efficiently.
- Wire Cutters: For trimming electrical wires to the right length.
- Voltage Tester: To verify the power is off before you start working.
In addition, a ceiling fan mounting kit is often necessary, complete with a pre-galvanized octagon ceiling box designed specifically for fan installation.
When mounting the electrical box, prefer using wood screws over nails for a more secure attachment.
Don't forget to have electrical tape and wire connectors on hand for safe and effective electrical connections.
Familiarity with your household circuit layouts can also be beneficial, especially if you have clamp amp probes to check current draw on circuits.
Safety Equipment Requirements
Guaranteeing your safety during the installation of a ceiling fan is essential, so don't overlook the importance of proper safety equipment. First, always use a voltage tester to confirm that the power is off at the light switch before you begin any work. This step is critical to prevent accidental electrocution and guarantee a safe environment.
Additionally, equip yourself with safety gear like gloves and safety glasses. Gloves will protect your hands from sharp edges and electrical shocks, while safety glasses will shield your eyes from debris.
Using insulated tools is also significant; these tools reduce the risk of electrical shock when handling live wires.
When working at height, a sturdy ladder or step stool is necessary for safe access to the ceiling. Make sure it's stable and placed on even ground to prevent falls.
Finally, don't forget to have a reliable set of basic tools like screwdrivers, pliers, and wire cutters handy. With the right safety equipment in place, you're much better prepared to tackle your ceiling fan installation confidently and securely.
Wiring and Connection Tools
Equipping yourself with the right wiring and connection tools is essential for a smooth ceiling fan installation. You'll need to gather several key items to guarantee everything goes according to plan.
Here's a quick list of what you should have on hand:
- Screwdriver: For securing and removing the old light fixture and fan.
- Drill: To create necessary mounting holes and secure the mounting kit.
- Wire Cutters: For trimming excess wiring and preparing connections.
- Voltage Tester: To confirm that the power is off before you start working.
Additionally, don't forget about the ceiling fan mounting kit, which often includes a pre-galvanized octagon ceiling box for sturdy installation.
When dealing with wiring, make sure you're using the correct wire size and type; typically, the black wire powers the fan, while the blue wire is for the light kit. Secure those connections with electrical tape and connectors to avoid any electrical hazards.
Familiarizing yourself with your household circuit layouts can also help guarantee your new ceiling fan operates efficiently without exceeding load capacity.
Step-by-Step Installation Process

To successfully install a ceiling fan in place of an existing light fixture, start by verifying your electrical box is rated to support the fan's weight. If it's not, consider installing a ceiling fan brace kit for added support.
Once you're set, turn off the power at the circuit breaker to guarantee safety.
Next, remove the existing light fixture by unscrewing the cover plate and disconnecting the wiring.
After that, install the mounting bracket of the ceiling fan to the electrical box, making sure it's securely fastened to at least two ceiling joists for stability.
Now, it's time to connect the ceiling fan's wiring to the corresponding wires in the ceiling. Typically, you'll connect black to black (fan), white to white (neutral), and green or bare copper to ground.
Make sure all connections are secure to prevent any issues.
Once everything is connected, mount the ceiling fan to the bracket.
Finally, restore power at the circuit breaker and test the fan to verify it operates correctly.
You've successfully replaced the light with a ceiling fan!
Troubleshooting Common Issues

Installing a ceiling fan can bring added comfort, but troubleshooting common issues is crucial to maintain its functionality. If you encounter problems, here are some things to check:
- Flickering lights: This could mean improper wiring or that your fan draws too much power. Inspect the wiring connections and circuit capacity.
- Tripping circuit breaker: If your breaker trips while the fan runs, the load might exceed the circuit's amperage. You may need to replace a ceiling fan with one that has a dedicated circuit.
- Remote connectivity issues: Verify the remote is within range and that the fan's receiver is correctly installed and wired.
- Light switch malfunctions: If your switch isn't working after installing the fan, it may have been improperly wired or need replacement to handle the fan's electrical requirements.
If you still face operational problems, consulting the installation manual can help. Additionally, ensuring your fan is Energy Star certified can enhance efficiency and prevent potential electrical issues.
Persistent issues might require professional assistance to guarantee everything meets safety standards.
Keeping these points in mind will help you enjoy your new light and fan combination without hassle.
DIY vs. Professional Installation

Deciding whether to tackle the installation of a ceiling fan yourself or hire a professional can greatly impact your project's success and safety.
If your existing wiring is modern and in good condition, a DIY installation might be feasible. You can often replace a light fixture with a ceiling fan without much hassle. However, if rewiring is necessary or you need a separate switch for independent fan control, it's best to consult a professional.
Hiring an electrician brings several advantages. Professionals have the tools and expertise to guarantee a secure installation, reducing the risk of hazards like wobbling fans or electrical issues.
Plus, they're familiar with local electrical codes, ensuring compliance. The average installation time ranges from 1 to 3 hours, but DIYers may face unforeseen complications that could prolong the process.
If you're in doubt about your skills or the complexity of the job, it's wise to hire a professional. Not only does this provide peace of mind, but it may also come with warranty benefits for the work performed.
Ultimately, weighing your comfort level with electrical work will guide your decision.
Enhancing Room Comfort With Fans

Ceiling fans play an essential role in enhancing room comfort, providing a revitalizing breeze that can make a significant difference in how you feel indoors.
By creating a wind-chill effect, these fans help the air feel cooler during warmer months while ensuring better air circulation all year round. Installing a ceiling fan can also complement your existing water-saving options by reducing the need for air conditioning. Additionally, the use of ceiling fans can help increase energy efficiency by distributing thermal energy evenly throughout the room. In fact, using ceiling fans can lead to reduced energy consumption by allowing for higher thermostat settings without sacrificing comfort. Regularly maintaining your ceiling fan can ensure optimal performance and enhanced air quality in your home.
You'll appreciate the benefits they bring:
- Increased comfort: Feel up to 10°F cooler without cranking up the AC.
- Energy savings: Set your thermostat a few degrees higher in summer, reducing cooling costs by 3-8%.
- Versatile use: Reversible motors let you switch between cooling and warming modes effortlessly.
- Improved air quality: Circulate and filter air, lowering humidity and reducing mold risks.
When you install a ceiling fan, you not only replace a light fixture but also enhance your living space. Additionally, the act of maintaining high vibrational energy can make your environment feel even more uplifting and enjoyable.
Just flip the switch to experience immediate comfort.
Plus, the aesthetic appeal of a ceiling fan can elevate your room's style.
Frequently Asked Questions
Can You Replace a Normal Light With a Ceiling Fan?
Yes, you can replace a normal light fixture with a ceiling fan, but you need to guarantee a few things first.
Check that your existing electrical box can support the fan's weight and is securely mounted.
Verify the wiring meets the fan's electrical requirements, and if necessary, install a brace kit for added support.
After installing, test the fan and light functions to guarantee everything operates smoothly without any wobbling or vibrations.
How Do I Know if My Light Box Will Support a Ceiling Fan?
To know if your light box will support a ceiling fan, check if it's rated for fan use.
Look for a UL listing; if it's missing, that's a red flag.
Inspect the mounting—ensure it's securely attached to a ceiling joist.
If your box is old or from the 1920s, consider upgrading.
Finally, confirm the fan's weight doesn't exceed the box's limit; a 10:1 safety factor is ideal for stability.
How Much Does It Cost to Replace a Light Fixture With a Ceiling Fan?
Replacing a light fixture with a ceiling fan typically costs between $150 and $300, which includes the fan and installation.
Notably, about 75% of homeowners report enjoying increased comfort and energy efficiency with ceiling fans.
However, if your electrical work is complex or outdated, you might face additional costs, especially if you need a new support structure or rewiring.
Choosing a fan with integrated lighting may help you save overall.
Do You Need an Electrician to Install a Ceiling Fan Light?
You don't necessarily need an electrician to install a ceiling fan light, but it's often a smart choice.
If you're unsure about your wiring skills or if your electrical box isn't rated for a fan's weight, hiring a professional can save you from potential issues.
They'll guarantee everything's connected correctly and up to code, preventing problems like flickering lights or tripped breakers.
Plus, it'll give you peace of mind knowing it's done safely.
Conclusion
So, if you're looking to swap out that light for a ceiling fan, you're not just changing a fixture—you're transforming your space into a haven of comfort. With the right tools and knowledge, you can tackle this project yourself or call in a pro if it feels overwhelming. Just remember, every spin of the fan doesn't just circulate air; it circulates a sense of home. So, go ahead and bring that breeze indoors!