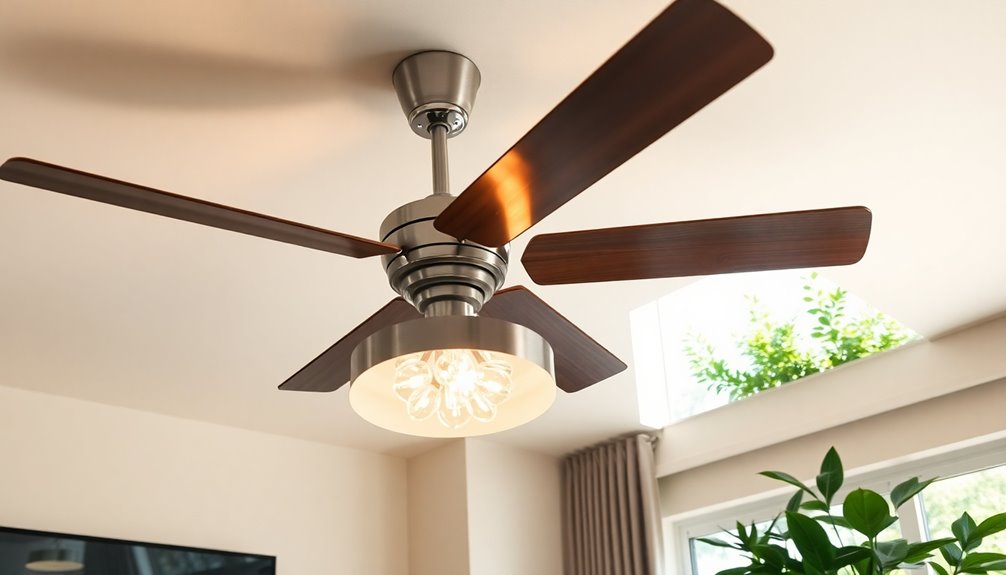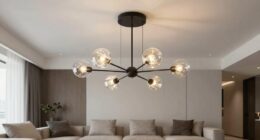

To put a downrod on your flush mount ceiling fan, start by unscrewing the existing canopy cover and disconnecting wires from the bracket. Ensure downrod compatibility, and locate screw holes on the fan housing for installation. Remove the bracket, discard the bottom nut, and take off the fan's hole shaft by unscrewing it carefully. Consider a swivel mount for a light fixture, secure it to a water pipe with washers and nuts, and thread wires through for safety. Hang the fan using angle brackets securely attached with sheet rock anchors.
Enhance the fan's appearance with a decorative canopy or collar for a polished look. Choosing the right downrod can optimize performance and aesthetics. My insights can help you tackle this DIY project with confidence.
Key Takeaways
- Remove existing canopy cover and bracket for downrod installation.
- Ensure downrod compatibility with fan model for secure attachment.
- Detach hole shaft carefully to prepare for downrod connection.
- Choose a suitable downrod length for improved air circulation.
- Securely attach the downrod to the fan motor housing for stability.
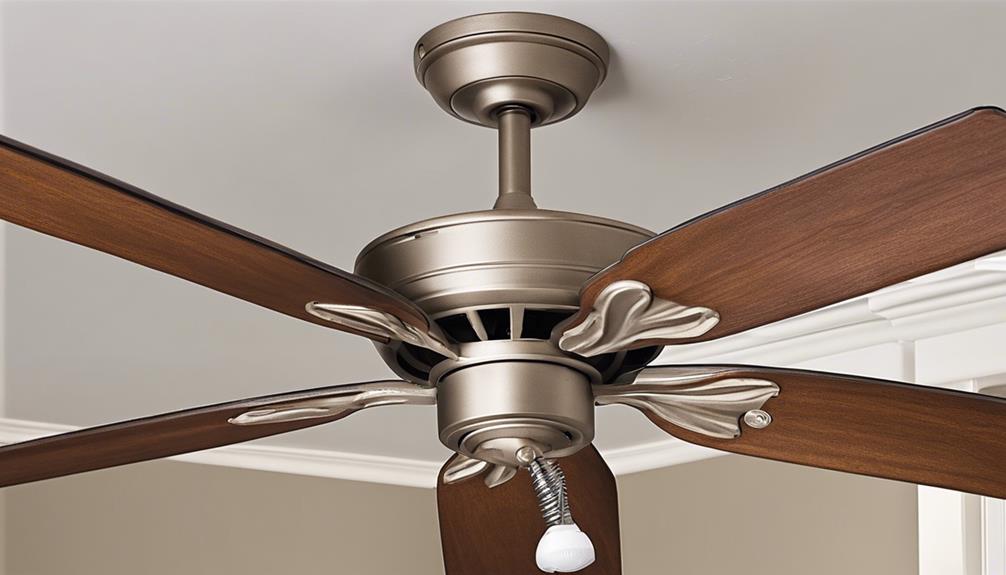
Disassemble the Flush Mount Ceiling Fan
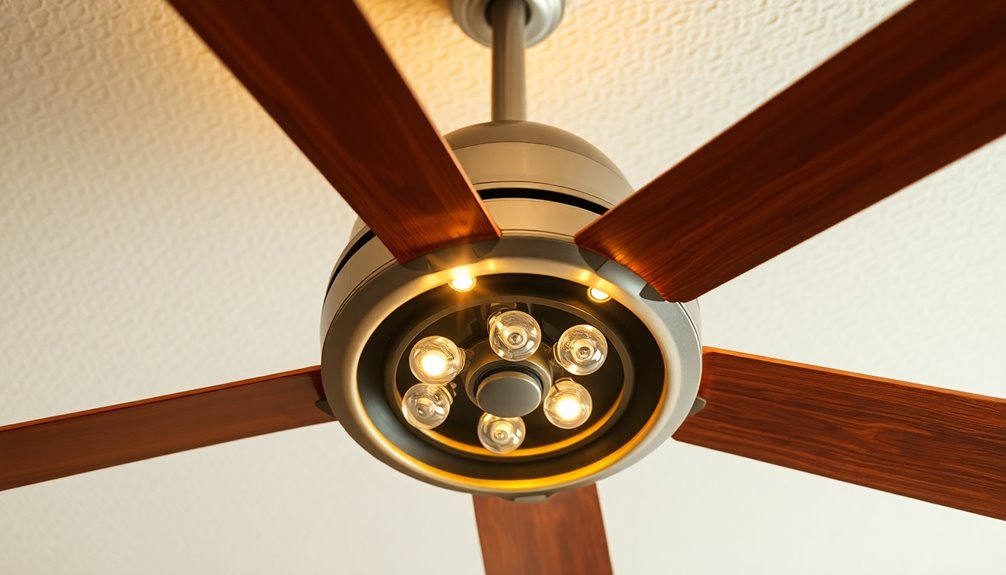
To begin disassembling the flush mount ceiling fan, unscrew the existing canopy cover from the base. This step is crucial as it allows access to the inner workings of the ceiling fan, including the light fixture and fan motor.
Once the canopy cover is removed, you can easily locate the screw holes on the fan motor housing where the downrod will be attached. This part of the process is essential for ensuring a secure connection between the downrod and the fan, providing stability for the entire ceiling fan system.
Taking apart the ceiling fan also involves disconnecting the wires connected to the existing bracket. This prepares the fan for the downrod installation by ensuring a clean and organized workspace. By following these steps carefully, you can guarantee that the downrod is compatible with the fan model and of the correct length for proper installation.
This attention to detail will result in a successfully disassembled flush mount ceiling fan, ready for the next steps in the downrod installation process.
Remove the Bracket and Bottom Nut

After unscrewing the canopy cover in the disassembling process, the next step involves removing the bracket and bottom nut to prepare for attaching the downrod to the fan.
When it comes to bracket removal techniques, it's essential to locate the bracket at the base of the light fixture and unscrew the nut securing it in place. Make sure to discard the bottom nut to create space for the downrod attachment process. This step is crucial for ensuring a stable connection between the downrod and the ceiling fan. By following proper nut securing methods, you can guarantee a secure installation.
This process not only facilitates improved air circulation by allowing the fan to hang lower but also offers aesthetic enhancements to your space. Providing ample space for the downrod attachment is key to achieving a seamless transition from a flush mount to a downrod installation, enhancing both functionality and visual appeal.
Take off the Ceiling Fans Hole Shaft
First, ensure the ceiling fan is turned off before starting.
Then, locate the nut securing the hole shaft at the center of the fan.
Use the appropriate tools to carefully unscrew and remove the nut to detach the hole shaft.
Remove Ceiling Fan Shaft
Carefully unscrewing the nut at the base of the light fixture and discarding the bottom nut is the first step in removing the ceiling fan shaft. Ensuring the ceiling fan shaft is detached securely is essential for downrod attachment techniques.
This modification is a crucial part of the installation process when transitioning from a flush mount to a downrod ceiling fan. Precautions must be taken during shaft removal to guarantee downrod compatibility and a smooth installation.
Disconnect Fan Hole
I start by removing the bracket and then unscrew the nut at the base of the light fixture on the ceiling fan to disconnect the fan hole. By discarding the bottom nut and carefully taking off the ceiling fan's hole shaft, I prepare for the downrod installation.
It's crucial to ensure the ceiling fan is turned off and all electrical connections are disconnected before proceeding. Throughout this process, keeping track of all removed hardware and components will make reassembly with the downrod much smoother.
Additionally, inspecting the fan hole shaft for any damage or wear is vital to identify any potential issues that may require replacement before installing the downrod. For troubleshooting fan hole issues, exploring alternative mounting methods and following downrod installation tips can help achieve a successful installation.
Obtain a Swivel Mount for a Light Fixture

When considering a swivel mount for a light fixture, it's crucial to explore the available options based on your ceiling's angle.
Installing the swivel mount properly ensures the light fixture hangs straight and secure.
Make sure to check compatibility with the water pipe diameter for a stable connection.
Swivel Mount Options
To install a light fixture on an angled ceiling, consider acquiring a swivel mount for enhanced positioning flexibility. When choosing a swivel mount, look for various finishes to match your decor, ensuring a cohesive look. Check the adjustability options of the swivel mount to guarantee it can meet your specific needs for angling the light fixture correctly.
Additionally, familiarize yourself with proper swivel mount installation techniques to ensure a secure and stable attachment to the ceiling. By selecting the right swivel mount with suitable finishes, adjustability, and installation techniques, you can confidently install your light fixture on an angled ceiling for optimal illumination and style.
Installation Steps Overview
Considering the flexibility and stability of a swivel mount for a light fixture is key when planning to install a ceiling fan on an angled ceiling. The swivel mount offers advantages in adapting to varying ceiling angles, ensuring proper downrod alignment techniques.
To enhance stability, connecting the swivel mount plate to a half-inch water pipe is recommended, with one side of the water pipe threaded for installation ease. Drilling a hole through the water pipe to align with the ceiling fan shaft hole is crucial for stability. Secure the bolt, thread the wires, and include washers, a lock washer, and a nut for a secure installation.
The water pipe stability considerations play a vital role in ensuring a robust and safe mounting process.
Compatibility Considerations
Securing a swivel mount for a light fixture is essential for ensuring proper angling and stability on a sloped ceiling. When considering swivel mount compatibility for your ceiling fan installation, keep these points in mind:
- Allows for adjusting the light's position to achieve optimal illumination.
- Designed to accommodate angled ceilings while providing a secure attachment point.
- Connects to the water pipe, offering a stable and adjustable mounting solution for the light fixture on a sloped ceiling.
Ensuring compatibility with your ceiling fan's design is crucial to guarantee a seamless installation process and proper functionality. By selecting a suitable swivel mount, you can address angled ceiling solutions effectively, enhancing both the aesthetic appeal and functionality of your space.
Connect Swivel Mount Plate to Water Pipe

How can the swivel mount plate be securely connected to a water pipe for stability when installing a ceiling fan on an angled ceiling?
When dealing with angled ceiling solutions, utilizing a water pipe for stability is a smart move. The swivel mount plate offers great flexibility, and connecting it to a half-inch water pipe can provide the stability needed. Ensuring that one end of the water pipe is threaded is crucial for securely attaching the components.
To connect the swivel mount plate to the water pipe effectively, drilling a hole through the pipe that matches the shaft hole is necessary for a proper fit. Remember to secure the bolt, thread the wires through the pipe, and add washers, a lock washer, and a nut to complete the connection securely.
Drill Hole Through the Water Pipe

I use a drill to create a hole through the water pipe that lines up with the shaft hole for secure attachment. When dealing with mounting challenges, it's essential to follow proper pipe drilling techniques to ensure a secure fit.
Here are some key points to consider:
- Ensure the drill bit is suitable for drilling through the water pipe without causing damage.
- Maintain a steady hand and apply consistent pressure to create a clean and precise hole.
- Double-check the alignment of the drilled hole with the shaft hole to guarantee a seamless attachment process.
Considering electrical wiring considerations, it's crucial to thread the wires through the water pipe carefully to connect the fan's electrical components. By paying attention to these details and taking the necessary precautions, you can overcome mounting challenges effectively and ensure a safe and stable installation for your ceiling fan.
Secure a Bolt and Thread Wires Through

When securing the bolt, ensure it's tightly fastened to prevent any movement of the ceiling fan.
Thread the wires through the water pipe meticulously for a neat installation.
Remember to use washers, a lock washer, and a nut for added safety and stability.
Bolt Securement Tips
To ensure stability in your ceiling fan assembly, thread the wires through the water pipe and securely fasten a bolt using washers, a lock washer, and a nut. When securing the bolt, consider these tips for a successful installation:
- Align the bolt with the hole in the water pipe for a snug fit.
- Use washers to distribute pressure evenly and prevent damage.
- Tighten the nut with care to avoid over-tightening and potential issues.
These steps will help maintain the bolt stability and ensure the safety of your ceiling fan setup. Remember to follow safety precautions throughout the process to enjoy a securely installed fan.
Wires Threading Technique
Threading wires through a secure bolt in the water pipe enhances the safety and organization of the ceiling fan's electrical connections. This wire management technique ensures that the wires are neatly organized and concealed within the water pipe assembly, providing a clean and professional look.
By securing the bolt through the drilled hole in the water pipe, you create a secure anchor point for the threaded wires, preventing any movement during fan operation. Using washers, a lock washer, and a nut to fasten the bolt further secures the wires in place.
This method not only maintains neat organization but also helps in maintaining the safety and stability of the electrical connections within the ceiling fan setup.
Safety Precautions Reminder
After securely fastening the bolt through the drilled hole in the water pipe, the next step is to carefully thread the wires through for a clean and organized installation.
- Ensure the bolt is tightly secured using washers, a lock washer, and a nut to maintain stability.
- Thread the wires through the water pipe with precision to avoid any tangling or messy appearance.
- Prioritize safety precautions by double-checking the bolt's security to prevent hazards and ensure structural integrity.
Following these installation tips won't only help in maintaining the stability of the ceiling fan but also contribute to the overall safety of the setup. Remember, a well-secured bolt and neatly threaded wires are essential for a hassle-free and safe fan operation.
Attach Washers, Lock Washer, and Nut

I make sure to carefully place the washers, lock washer, and nut to securely fasten the downrod to the ceiling fan. Proper alignment technique is crucial here. By ensuring the washers are positioned correctly, I can evenly distribute pressure on the bolt, helping to maintain a stable connection. Selecting the right washer size is also important to guarantee a secure fit.
The lock washer plays a vital role in this process. Its benefits include preventing the nut from loosening due to vibrations or movement, enhancing the overall stability of the installation. When tightening the nut with the washers and lock washer, I reduce the risk of the downrod coming loose over time, providing peace of mind regarding safety and durability.
Hang the Fan Using Angle Brackets

To securely hang a flush mount ceiling fan with a downrod, angle brackets are essential for providing stable support and preventing any swaying or falling. When using angle brackets for hanging your fan, consider the following:
- Bracket alignment: Ensuring the angle brackets are aligned correctly is crucial for the stability of the fan. Proper alignment helps distribute the weight evenly and reduces the risk of wobbling.
- Fan stability: Angle brackets play a significant role in keeping your fan securely in place. They provide a sturdy foundation for the fan to hang from, enhancing overall stability.
- Safety measures: Prioritize safety by double-checking that the angle brackets are securely attached to the ceiling joists. This precautionary step minimizes the chances of accidents and ensures a safe installation process.
Securely Attach With Sheet Rock Anchors

Using sheet rock anchors is a reliable method for securely attaching a downrod to a flush mount ceiling fan. These anchoring techniques help distribute the weight of the fan evenly across the ceiling, enhancing ceiling fan stability.
It's essential to select anchors suitable for the weight and size of your fan to ensure proper attachment techniques. Following the manufacturer's installation instructions is crucial when utilizing sheet rock anchors.
Regularly inspect the anchors to confirm they're securely holding the fan in place, maintaining proper ceiling fan stability. Proper attachment techniques guarantee a safe and stable installation.
Consider Covering the Exposed Area

Consider enhancing the appearance of your flush mount ceiling fan by covering the exposed area with a decorative canopy or collar. When selecting canopy options, look for decorative solutions that complement the design of your ceiling fan. Some popular choices include:
- Intricately designed metal canopy: Adds a touch of elegance to your fan.
- Sleek glass collar: Provides a modern and stylish finish.
- Vintage-inspired fabric canopy: Offers a cozy and inviting look.
These decorative additions not only hide the wiring and junction box but also ensure seamless integration with your flush mount ceiling fan.
Ensure Aesthetically Pleasing Installation

I carefully selected a downrod that perfectly complements the finish of my flush mount ceiling fan for a seamless and aesthetically pleasing installation. Style selection was crucial to ensure that the downrod seamlessly integrated with the overall design of the room. By considering color coordination, I was able to create a cohesive look that enhanced the visual appeal of the space. The design integration of the downrod not only optimized air circulation but also added a touch of elegance to the ceiling fan setup.
Ensuring an aesthetically pleasing installation involved more than just functionality; it was about creating a harmonious atmosphere where every element complemented each other effortlessly. By paying attention to the details like style selection, color coordination, and design integration, I was able to achieve a cohesive look that brought the room together. Step back and admire your handiwork to confirm that the downrod enhances the overall aesthetics of the room, creating a space where you feel a sense of belonging.
Frequently Asked Questions
Can Downrod Fan Be Flush Mounted?
Yes, a downrod fan can't be flush mounted as it needs the downrod for proper airflow. Flush mounting it would hinder its performance. The downrod maintains the ideal distance between the fan blades and the ceiling.
Attempting to flush mount a fan designed for a downrod may lead to overheating and motor damage. Following the manufacturer's guidelines for installation is crucial. Compatibility considerations are key for optimal fan performance.
Can I Add a Downrod to Any Ceiling Fan?
I can't add a downrod to any ceiling fan. Not all fans are compatible with downrods due to their design. Adding one to an incompatible fan could risk safety and stability. It's best to check the manufacturer's guidelines or contact customer support for clarity.
Downrods are beneficial for airflow and aesthetics on compatible fans, enhancing their performance and look. Always follow instructions for safe installation and operation.
Can You Use a Downrod on a Low Profile Ceiling Fan?
Yes, a downrod shouldn't be used on a low profile ceiling fan due to low clearance.
Alternative options for better air circulation include using the fan on high speed or installing a different fan type.
For installation tips, it's crucial to follow the manufacturer's guidelines to ensure safety and optimal performance.
Always prioritize safety when considering modifications to your ceiling fan setup.
How Far Down Does a Flush Mount Ceiling Fan Hang?
When it comes to how far a flush mount ceiling fan hangs, the distance typically ranges from 8 to 12 inches from the ceiling. This can vary depending on the fan's design and manufacturer.
If you're looking to adjust the height for better airflow or aesthetic reasons, using a downrod is key. These rods come in various lengths to suit different ceiling heights, ensuring proper installation for optimal performance.
What Are the Benefits of Using a Downrod on a Flush Mount Ceiling Fan?
When looking for considerations for ceiling fans, using a downrod on a flush mount ceiling fan can provide several benefits. It allows for better air circulation by lowering the fan and keeping it at an optimal distance from the ceiling. This can improve the overall effectiveness and efficiency of the fan.
Conclusion
In conclusion, adding a downrod to your flush mount ceiling fan is a simple process that can enhance the functionality and style of your space.
By following these steps, you can easily transform your fan into a more versatile and visually appealing fixture.
So go ahead and elevate your ceiling fan game – it's time to reach new heights of cool!