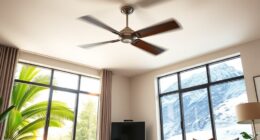
Yes, you can change the light fixture on a ceiling fan, which can improve both its functionality and look. Start by ensuring the power is off at the circuit breaker to avoid any electrical hazards. Then, unscrew the existing fixture and disconnect the wiring, matching the new lights' colors to the wires from the fan. Secure the new fixture in place and restore power to test it. Don't forget to take into account the style and size of the new light to match your decor. There's more you can explore for a seamless upgrade and enjoy the benefits of better lighting.
Key Takeaways
- Yes, you can change the light fixture on a ceiling fan by following proper installation steps and safety guidelines.
- Ensure power is off at the circuit breaker before starting the installation to avoid electrical hazards.
- Match wiring colors (black to black, white to white) when connecting the new light kit to the fan.
- Check for compatibility issues, such as the neck size of the existing fixture and any specific fittings needed.
- Regularly maintain and inspect the new light fixture to ensure optimal performance and longevity.
Benefits of Upgrading Light Fixtures

Upgrading light fixtures on your ceiling fan can greatly transform your space. By replacing traditional bulbs with a modern 9-inch 40W LED light engine, you can boost brightness considerably—from 1200 lumens to an impressive 3600 lumens. This enhanced illumination not only brightens up your room but also improves the overall ambiance, making your space feel more inviting and functional for various activities.
Moreover, LED light fixtures generate less heat than incandescent bulbs, reducing the risk of damage to your fan and extending the lifespan of both the fixture and the bulbs. You'll appreciate the longevity of LEDs, often lasting several years, which means less frequent replacements.
Another benefit is energy efficiency. Upgrading to LED fixtures can lead to lower electricity bills, which is good for your wallet and the environment, thanks to reduced energy consumption.
Plus, if you choose dimmable LED options, you'll gain the flexibility to adjust lighting levels to match your mood or setting, adding versatility to your space.
Installation Steps for Light Kits

Installing a new light kit on your ceiling fan can be a straightforward DIY project that enhances both functionality and aesthetics.
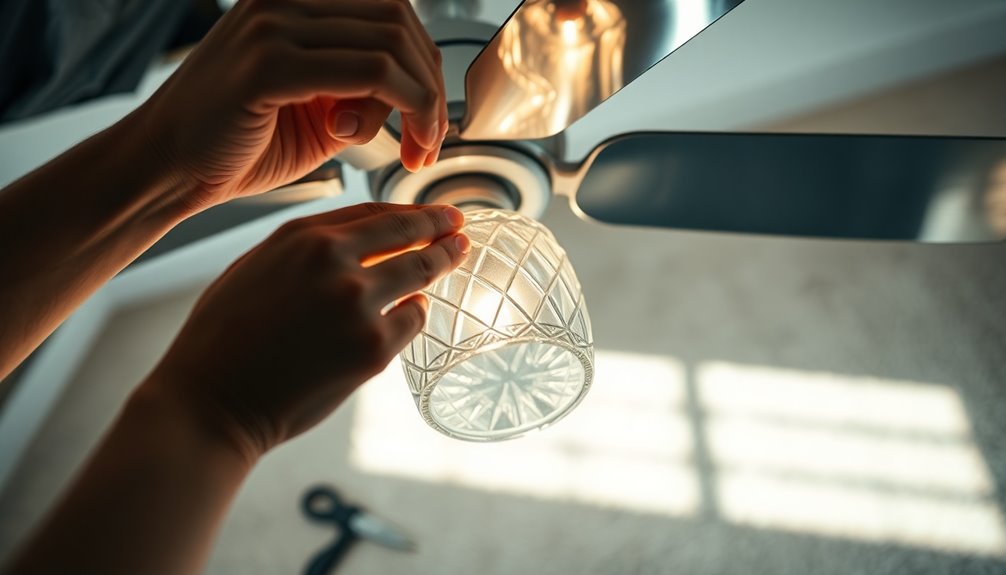
First, verify the power is turned off at the circuit breaker to avoid any electrical hazards. Once the power is off, disconnect the existing light kit by unscrewing it.
When connecting the new light kit, carefully match the wiring colors: black to black, white to white, and ground to ground.
Next, secure the new light kit to the fan's motor housing using the provided screws. Make sure all connections are tight and properly insulated with wire nuts to prevent any electrical issues.
After securing the light kit, attach any glass shades or bulbs that came with it. Be cautious not to over-tighten, as this can hinder heat dissipation.
Once everything is assembled and secure, restore power to the fan.
Finally, test the functionality of both the fan and the new light fixture to confirm they operate correctly. Following these steps will help you successfully install your new light kit and enjoy the improved illumination in your space.
Common Installation Challenges

When changing a light fixture on your ceiling fan, you'll often face compatibility issues with existing fixtures.
It's essential to measure the neck size of your current fixture to guarantee the new light kit fits properly.
Additionally, be aware of heat buildup in enclosed fixtures, as this can lead to LED failure if not addressed.
Compatibility With Existing Fixtures
Charting compatibility with existing fixtures can be a frustrating experience, especially given the rapid evolution of manufacturing standards. When you're looking to change the light fixtures on your ceiling fan, you must first check the neck size of the existing fixture. This guarantees that the new light engine or fixture fits properly.
Some light engines require specific threaded rod fittings, so measuring the entire light engine is vital for compatibility with the lamp shade neck. Additionally, the limited options for light kits from the same manufacturer can restrict your choices, making it important to evaluate available alternatives carefully.
Here's a quick reference table to help you assess compatibility:
| Feature | Considerations |
|---|---|
| Neck Size | Measure existing fixture |
| Threaded Rod Fittings | Identify required type |
| Manufacturer Options | Check for availability |
| Light Kit Alternatives | Explore other brands |
Heat Buildup Issues
Heat buildup in ceiling fan light fixtures can pose a significant challenge, especially for LED installations. If you're not careful, this can lead to premature LED failure.
Here are some tips to help you manage heat issues effectively:
- Choose the Right Light Bulbs: Opt for LED light engines with lower wattage. They provide ample lumens without generating excessive heat.
- Ensure Proper Ventilation: Select fixtures designed to dissipate heat. Regularly inspect and clean your fixtures to prevent dust buildup, which can obstruct airflow.
- Install Carefully: When installing, don't over-tighten the glass globes. This allows heat to escape and reduces the risk of damage to the fixture.
Design Considerations for Fixtures

When choosing a new light fixture for your ceiling fan, think about how its style matches your room's decor.
Make sure the size is right, as a fixture that's too big or small can throw off the balance.
You should also consider the lighting temperature to create the perfect atmosphere for any occasion.
Fixture Style Matching
Choosing the right light fixture for your ceiling fan can make a notable difference in your room's overall aesthetic. When you're selecting a new fixture, consider how it fits within your existing decor.
Whether your style leans modern, vintage, or adaptable, matching the fixture to your ceiling fan will create a harmonious look.
Here are three key factors to keep in mind:
- Style Compatibility: Confirm the light fixture aligns with the design elements of your fan, such as blade style and color. A cohesive look enhances your room's ambiance.
- Finish Coordination: Select a finish that complements other hardware in the room, like brass, chrome, or matte black. This attention to detail makes a considerable impact on the overall design.
- Light Distribution: Evaluate the functionality of the fixture. Some designs offer better illumination or dimming features, which can greatly affect how the light interacts with the space.
Size and Proportion
Size and proportion play an essential role in selecting the right light fixture for your ceiling fan. When you choose a light fixture, make certain it complements the fan's diameter to maintain visual balance in the room. Oversized fixtures can overwhelm smaller spaces, while undersized fixtures might look insignificant. Consider the dimensions of your room carefully.
Additionally, the height of the light fixture should align with your ceiling height to avoid obstruction and guarantee proper light distribution. Mixing styles can create a unique aesthetic, but it's essential that the fixture's design matches the fan to avoid a disjointed look.
Here's a quick reference table to guide your selection:
| Fixture Size | Room Size |
|---|---|
| 9-12 inches | Small rooms |
| 13-20 inches | Medium rooms |
| 21-30 inches | Large rooms |
| 31 inches and up | Extra large spaces |
Aim for a fixture that provides adequate lumens—like a 9-inch 40W LED light engine producing 3600 lumens—to guarantee sufficient illumination without overpowering the space.
Lighting Temperature Selection
In recent years, selecting the right lighting temperature has become essential for creating the desired mood in any room. When you're choosing fixtures for your ceiling fan, consider how the lighting temperature can impact your space. Warmer temperatures (around 2700K) create a cozy atmosphere, while cooler temperatures (around 4000K) promote alertness and productivity.
Here are three key points to keep in mind during your lighting temperature selection:
- Mix It Up: Combining warm and cool bulbs in the same fixture can enhance the overall lighting effect, giving you the best of both worlds.
- Match Your Space: Warm tones work well in living areas and bedrooms, while cooler tones are ideal for kitchens and workspaces.
- Customize with LEDs: Many LED light engines offer a range of color temperatures, allowing you to tailor the lighting to fit the room's function—whether it's for relaxation or focused tasks.
Choosing the right lighting temperature not only sets the mood but also impacts the perceived size and comfort of your space.
Electrical Safety Guidelines

How can you guarantee your safety while changing a light fixture on a ceiling fan? Following electrical safety guidelines is essential to avoid accidents. Start by turning off the power at the circuit breaker; this simple step can prevent electric shock. Use a voltage tester to confirm the power is off before you touch any wires. Always wear rubber-soled shoes and avoid working in wet conditions to reduce electrical hazards.
Here's a quick reference table to keep you safe:
| Safety Step | Description | Importance |
|---|---|---|
| Turn Off Power | Switch off at the circuit breaker | Prevents electric shock |
| Test for Voltage | Use a voltage tester to verify power is off | Confirms safe working environment |
| Wear Proper Footwear | Opt for rubber-soled shoes | Minimizes risk of electrical hazards |
| Check Wiring Connections | Confirm connections are secure with wire nuts | Prevents short circuits or fires |
| Regular Inspections | Check for wear or damage in electrical components | Identifies potential safety risks |
Maintenance Tips for Light Fixtures

After guaranteeing your safety while working with electrical components, it's time to focus on maintaining your light fixtures. Regular upkeep not only enhances their appearance but also boosts their performance and longevity.
Here are some essential maintenance tips for your light fixtures:
- Dust and Clean Regularly: Make it a habit to dust and clean your light fixtures to prevent buildup. This keeps them shining bright and helps reduce heat retention, which can extend the life of your LED bulbs.
- Inspect Bulbs: Periodically check your bulbs for any signs of burnout or flickering. These symptoms might indicate compatibility issues or that it's time for a replacement.
- Check Wiring and Connections: During maintenance, examine all wiring and connections for wear or damage. This step is vital to prevent electrical hazards and guarantee that your light fixtures operate safely.
Additionally, consider scheduling a professional inspection for complex fixtures at least once a year. Modern Energy Star certified fans can also enhance your lighting experience by improving airflow and reducing energy costs.
Keeping a record of any modifications or installations you've made can also aid in troubleshooting and future maintenance.
Cost and Budgeting Tips

Upgrading your ceiling fan light fixture can be a smart investment, but it's essential to plan your budget wisely.
Start by considering the initial purchase cost, which typically ranges from $50 to over $200, depending on the style and features you choose. If you plan to hire a professional for installation, factor in an additional $100 to $300 to your total budget.
To maximize your investment, look for energy-efficient LED fixtures. While they may have a higher upfront cost, they can save you up to 80% on energy bills over time. This not only benefits your wallet but also contributes to a more sustainable home. Additionally, selecting energy-efficient models can enhance your overall savings on cooling costs.
Don't forget to compare prices across different retailers and online platforms. You might find significant price variations for the same ceiling fan light fixture, so take the time to hunt for the best deals.
Finally, consider the potential increase in your property value with upgraded fixtures. This could make your investment even more worthwhile in the long run, blending practicality with enhanced aesthetics. Additionally, selecting fixtures with high energy efficiency can further reduce long-term costs associated with lighting.
Frequently Asked Questions
Can You Put a Different Light on a Ceiling Fan?
Yes, you can put a different light on a ceiling fan. Just make certain the new fixture matches the fan's mounting bracket and electrical connections.
When choosing a light, check that it fits the existing dimensions and neck size. LED light engines are a great option for brighter illumination.
Always confirm compatibility with the fan's electrical system, and opt for fixtures designed for fans to guarantee they handle vibrations and heat effectively.
Can You Change a Light Fixture to a Ceiling Fan?
You've probably felt that moment when a room just doesn't feel right.
Changing a light fixture to a ceiling fan can breathe new life into your space! Just make sure your ceiling outlet box can support the fan's weight.
You'll need to connect the wires properly and install a support bar for stability.
Once you've got everything set up, flip the switch and enjoy the cool breeze and cozy ambiance!
Can I Replace the Light Kit on My Ceiling Fan?
Yes, you can replace the light kit on your ceiling fan. Just make certain the new kit matches your fan's model.
Before you start, turn off the power at the circuit breaker to stay safe.
You'll connect the wires using standard colors: black for hot, white for neutral, and green or bare for ground.
After installing, secure the kit and test it to guarantee everything works properly.
Enjoy your upgraded lighting!
How to Remove a Ceiling Fan Light Fixture?
To remove a ceiling fan light fixture, you'll want to start by turning off the power at the circuit breaker.
Next, unscrew any decorative elements or shades to access the bulbs.
Support the fixture while you unscrew the mounting screws connecting it to the fan.
Carefully detach the wiring connections, noting how they're hooked up.
Once it's out, check for any wear or damage before installing a new fixture.
Conclusion
In the dance of home improvement, swapping out your ceiling fan's light fixture can breathe new life into your space. By embracing this simple upgrade, you're not just enhancing aesthetics; you're also inviting a warm glow that transforms your room. So roll up your sleeves, follow the steps, and don't shy away from the occasional hiccup. With a little effort, you'll create a delightful ambiance that brightens both your home and your spirit.
