
Yes, you can add a light to a ceiling fan that doesn't have one, as long as the fan is compatible with a light kit. First, check if your fan has a housing assembly for a light kit and look for capped wires inside the housing. You'll need a few tools, like a screwdriver and wire nuts, to complete the installation safely. Be sure to turn off the electricity at the breaker before starting. If you're unsure about the wiring or compatibility, there are steps to troubleshoot common issues. Stick around, and you'll find more useful details about the process!
Key Takeaways
- You can add a light kit to a ceiling fan, but ensure compatibility with the fan model and check for existing wiring options.
- Verify that the fan has a housing assembly designed for light kits and capped wires for connections.
- Installation may require basic tools like screwdrivers, wire nuts, and a voltage tester for safety and proper connections.
- Follow electrical codes and guidelines during installation, ensuring that the fan can support the additional weight of the light kit.
- If adding a light kit is not feasible, consider alternative lighting solutions like lamps or wall-mounted fixtures for illumination.

Aspen Creative 22013-1, Three-Light Ceiling Fan Light Kit with Pull Chain, Matte White Finish with Clear Glass Shades, 13-1/8" Diameter x 6-3/4" Height
Fixture Size: 13-1/8" D x 6-3/4" H | Glass Shades: 2-1/8" Fitter, 4-5/8" D x 4-5/8" H |…
As an affiliate, we earn on qualifying purchases.
As an affiliate, we earn on qualifying purchases.
Assessing Compatibility for Light Kits

When considering adding a light kit to your ceiling fan, it's important to assess compatibility first. Start by checking if your existing fan has a housing assembly designed for light kits. This step is essential for guaranteeing everything fits together properly.
Look inside the fan's housing for capped wires, typically black (power) and white (neutral). These wires indicate that your fan can support a light kit.
Next, confirm the diameter of your ceiling fan's attachment point. You want to verify that the light kit you choose fits snugly without any issues.
It's also wise to check your ceiling fan's model and specifications against the available light kits. This helps you avoid any compatibility mismatches that could lead to frustration during installation.
Lastly, assess your fan's electrical capacity. Make sure it can handle the additional load from the light kit, keeping wattage limits in mind for safety.
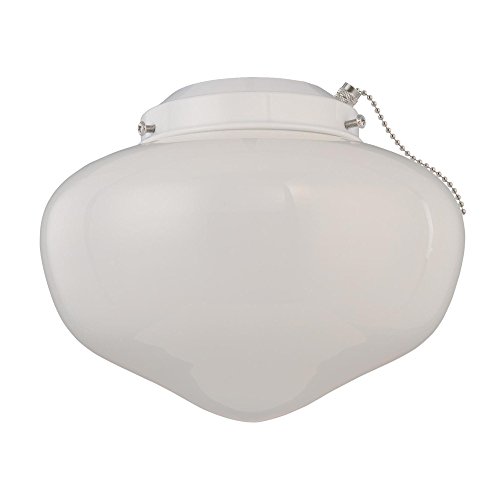
Westinghouse 7785300 LED Schoolhouse Indoor/Outdoor Ceiling Fan Light Kit, White Finish with White Opal Glass
Energy-efficient schoolhouse light kit with white opal glass shade adds a traditional accent to ceiling fans
As an affiliate, we earn on qualifying purchases.
As an affiliate, we earn on qualifying purchases.
Tools Needed for Installation

Installing a light kit on your ceiling fan requires a few essential tools to guarantee a smooth process. Having the right tools at your disposal not only simplifies the installation but also assures safety and effectiveness.
Here's a quick list of what you'll need:
- Phillips head screwdriver
- Slotted screwdriver
- Voltage tester
- Wire nuts and electrical tape
First, you'll need both Phillips and slotted screwdrivers to secure the light fixture and access the wiring. A voltage tester is essential; it helps confirm that the power is off before you start any electrical work. This step is crucial for your safety.
Wire nuts are necessary for securely connecting the wires during the installation process, preventing any risk of short circuits. Additionally, you might want to have electrical tape on hand to provide an extra layer of protection for those wire connections.
If your ceiling fan box needs it, consider including extendable arms or additional mounting hardware to properly secure the light fixture.
With these tools ready, you'll be well-equipped to tackle your ceiling fan light kit installation.

TIPTOE STICK for ceiling fan pull chains Portable hand fan switch controller for electric power light bulb and fan speed adjustment extension tool for use in home, restaurant, patio (Original)(Black)
As an affiliate, we earn on qualifying purchases.
As an affiliate, we earn on qualifying purchases.
Step-by-Step Installation Process

Now that you've gathered your tools, it's time to focus on the installation process.
Start by ensuring safety—always turn off the electricity at the circuit breaker before you begin.
Once you're ready, follow the wiring and connection steps to seamlessly attach your new light kit to the ceiling fan.
Required Tools and Safety
To successfully add a light to your ceiling fan, you'll need a few essential tools and a focus on safety. First and foremost, verify you have the right tools for the installation process:
- Phillips head screwdriver
- Slotted screwdriver
- Wire nuts for secure connections
- Voltage tester to check power status
Before you start, always turn off the electricity at the circuit breaker. This step is vital for your safety while working on electrical components.
After cutting the power, use a voltage tester to confirm that the electricity is indeed off before touching any wires. It's also important to check that your ceiling fan has a housing assembly compatible with a light kit, which typically includes pre-wired connections.
Once you've gathered your tools and verified the power is off, you'll be ready to proceed with the installation.
As you work, make sure all wiring is properly insulated and secure, using wire nuts to avoid any electrical shorts or hazards. Prioritizing safety and using the right tools will make the process smoother and more secure.
Wiring and Connection Steps
Before diving into the wiring connections, verify you've confirmed the power is off at the circuit breaker. Safety is your top priority.
First, check if the ceiling fan has a housing assembly that supports a light kit. You should see capped wires ready for connection.
Next, take the wires from your light kit. Connect the black wire (for power) to the black wire on the fan and the white wire (neutral) to the white wire. Don't forget to securely attach the ground wires; they're essential for safety. Use wire nuts to insulate these connections. Make certain all wires are properly connected to prevent any electrical shorts.
Once you've attached the light fixture, double-check your connections, then restore power at the breaker. Turn on the switch to test the installation. You should see the light and fan operate correctly.
If something doesn't work, double-check your wiring connections to verify everything is in order. Following these steps carefully will guarantee your light kit is safely and effectively added to your ceiling fan. Enjoy the added brightness!

4'' Ceiling Fan Fixture Mounting Bracket Kit, Universal Ceiling Light Crossbars Mounting Bracket, 180 Degree Lighting Fixture Kit with Screw and Nuts for Wall Light, Living Room Lamps, Pendant
Rotatable Design: This light fixture mounting bracket allows for 180-degree rotation or fixed mounting, allowing one set of…
As an affiliate, we earn on qualifying purchases.
As an affiliate, we earn on qualifying purchases.
Wiring Connections Explained

Understanding the wiring connections for adding a light kit to a ceiling fan is essential for guaranteeing a safe and functional installation. Most ceiling fans come pre-wired with capped wires for light kits, typically featuring black (power) and white (neutral) wires for easy connection.
If you find only one wiring set, you may need to modify the existing wiring or install a separate switch for independent control of the light.
Here are some key points to remember:
- Connect the blue wire of the light kit to the hot switch leg if you're using a single switch setup.
- Use a third insulated wire for separate switches to control the fan and light independently.
- Secure your connections with wire nuts, adhering to the standard color coding: black for live, white for neutral, and green or bare for ground.
- Always follow local electrical codes and guidelines from the National Electrical Code (NEC) to guarantee your wiring connections are safe and compliant.
Troubleshooting Common Installation Issues

Troubleshooting common installation issues can save you time and frustration when adding a light kit to your ceiling fan.
First, check if your ceiling fan has a housing assembly that's compatible with light kits. Some fans are designed to support this addition, while others may not.
Next, inspect the wiring inside the fan's housing. Look for capped wires—typically black and white—that can be connected to your new light fixture.
If you've installed the light kit but it won't turn on, double-check all wiring connections. Verify everything is securely connected, and don't forget to check that your circuit breaker hasn't tripped. If it has, reset it and see if that resolves the issue.
Additionally, make certain your ceiling fan can handle the extra weight of the light kit without exceeding its electrical capacity or load limits.
It's also essential to consult the National Electrical Code (NEC) guidelines to confirm any modifications you make comply with safety standards and local building codes.
Safety Precautions and Compliance

Installing a light kit on your ceiling fan can enhance both functionality and aesthetics, but safety should always be your top priority. Before you begin, follow these essential safety precautions to guarantee a smooth installation process.
- Always turn off the power at the circuit breaker to prevent electrical shock.
- Check that the ceiling fan's mounting bracket can support the added weight of the light fixture.
- Verify that your existing wiring complies with the National Electrical Code (NEC) and any local building amendments.
- Use wire nuts and electrical tape to secure all wiring connections, making sure they're insulated to prevent shorts and fire hazards.
Taking these steps will help you avoid accidents and guarantee compliance with local building codes.
If you have any doubts about your wiring connections or local regulations, it's wise to consult a professional electrician. They can guide you through the process and guarantee that your installation meets safety standards.
Frequently Asked Questions
How to Add a Light to a Ceiling Fan That Doesn't Have One?
To add a light to your ceiling fan, start by checking if the fan supports a light kit. Measure the attachment point and verify compatibility with a light fixture.
Turn off the electricity, remove the decorative center plate, and connect the wires—black for power and white for neutral.
Ascertain the ceiling fan box can handle the light's weight. If needed, consider remote controls for easier operation.
Always follow safety regulations during installation.
Can I Add a Light Fixture to a Ceiling Fan?
Imagine transforming your ceiling fan into a radiant chandelier, bringing warmth to your space.
Yes, you can add a light fixture to a ceiling fan, but first, check if your fan's designed for it. Look for capped wires and measure the attachment point.
Make sure the fan can handle the extra load, and follow the manufacturer's guidelines for a safe installation.
With the right steps, you'll illuminate your room beautifully!
How Do I Know if My Ceiling Fan Is Light Kit Compatible?
To know if your ceiling fan is light kit compatible, check for a housing assembly that supports a light fixture.
Look inside for capped wires; typically, you'll find a black wire for power and a white one for neutral.
Verify your fan's model number against the manufacturer's specifications to see if a compatible light kit exists.
Finally, guarantee the mounting bracket can handle the extra weight, and confirm the fan's electrical capacity for safety.
How Do I Know if My Light Box Will Support a Ceiling Fan?
To know if your light box will support a ceiling fan, check for a "fan-rated" label. This indicates it's designed to handle the weight and motion of a fan.
Make certain the box's weight rating exceeds the combined weight of the fan and any light fixture you want to add.
Also, confirm it's securely fastened to a ceiling joist for stability, preventing wobbling or potential hazards during operation.
Conclusion
Adding a light to a ceiling fan without one can enhance your room's ambiance while boosting its functionality. Did you know that around 70% of ceiling fans sold today come with integrated lighting? This means you're not alone in wanting to brighten up your space! By following the compatibility checks and installation steps outlined, you can easily transform your fan. Just remember to prioritize safety and compliance to guarantee a smooth and successful installation. Enjoy your new light!