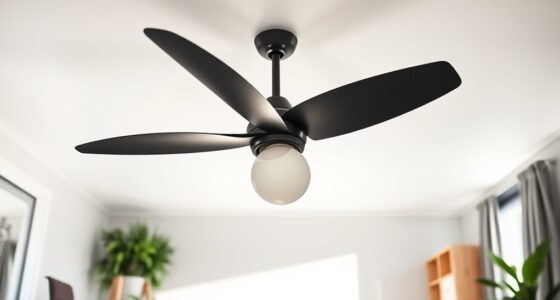
You can add a light kit to many ceiling fans, but it's essential to check compatibility first. Look for a housing cap that indicates it can support a light kit. Inspect for capped wires inside the fan, as well as ensuring your ceiling fan has the right connections. If your fan isn't compatible, you might contemplate universal light kits. Make sure to adhere to the wattage limits to prevent overloads. Always prioritize safety by turning off the power beforehand, and if you're unsure, exploring professional help could be wise. There's plenty more to ponder before you proceed.
Key Takeaways
- Not all ceiling fans are compatible with light kits; check for a pre-wired housing assembly.
- Inspect for capped wires within the fan to ensure proper connections for the light kit.
- Consult the fan manufacturer for compatible light kit options and wattage limits.
- Universal light kits can be used if the fan lacks specific compatibility; ensure proper fit.
- Always verify local codes and regulations before installation to ensure compliance and safety.

Amico Ceiling Fans with Lights, 42 inch Low Profile Ceiling fan with Light and Remote Control, Flush Mount, Reversible, 3CCT, Dimmable, Noiseless, Black Ceiling Fan for Bedroom, Indoor/Outdoor Use
Ceiling Fan with Light: Decorate your home with Amico ceiling fan! While bringing you coolness and comfort, it...
As an affiliate, we earn on qualifying purchases.
Safety First: Preparation Steps

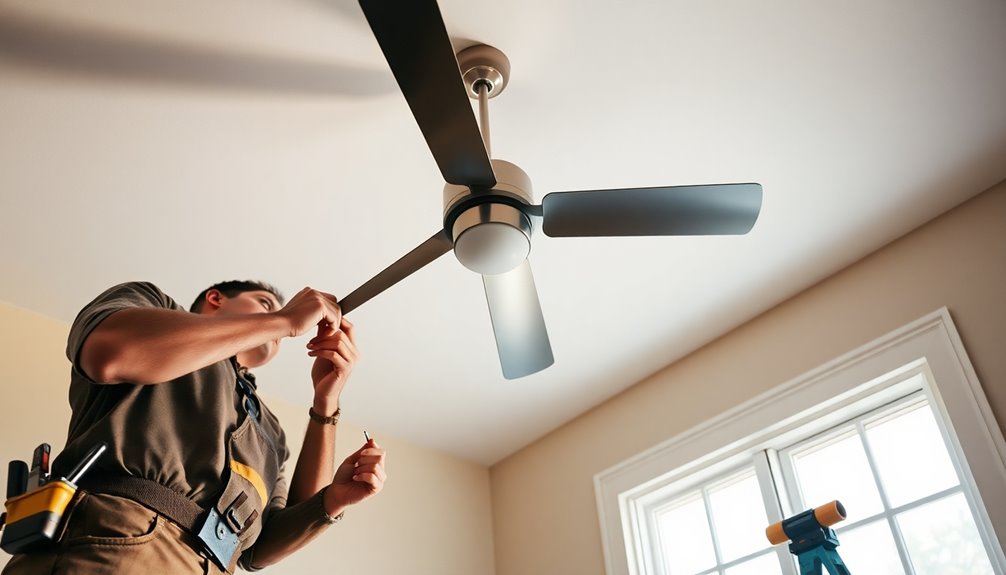
Before you begin adding a light kit to your ceiling fan, it's vital to prioritize safety. Start by turning off power at the circuit breaker. This guarantees your safety first and prevents any risk of electrical shocks during the installation process. If you're unsure which breaker controls the ceiling fan, it's best to turn off the entire panel.
Next, inspect the ceiling fan for a housing cap at the center. This cap indicates compatibility for attaching a light assembly. If you find it, you're on the right track.
While you're inspecting, also check for existing wiring inside the housing. This step is important, as it guarantees proper connections when you attach the light kit.
Gather your appropriate tools, like a Phillips head screwdriver and wire nuts. Using tools in good condition minimizes risks during installation.
Once everything's set, you can confidently proceed with the installation process, knowing you've taken the necessary precautions. Remember, a little preparation goes a long way in guaranteeing a smooth and safe experience as you enhance your ceiling fan with a stylish light kit.

Hunter 44 inch Outdoor or Indoor Ceiling Fan No Light - Black Ceiling Fan without Light, For Patio, Porch, Garage, or Living Room, Standard Mount, 3 Blades, Pull Chain - Cassius 50260, Matte Black
REVERSIBLE BLADES: Designed with reversible blades, this 44-inch fan lets you customize the look to suit your space...
As an affiliate, we earn on qualifying purchases.
Checking Fan Compatibility

Many ceiling fans aren't designed to accommodate light kits, so it's important to check compatibility before starting your project.
Here's what you need to do to verify your existing ceiling fan is ready for a light kit:
- Check for a pre-wired housing assembly: Look for specific components in your ceiling fan that support a light kit attachment.
- Inspect the wires: Make sure you find capped wires within the fan's housing. Typically, these will be black (power) and white (neutral).
- Confirm with the manufacturer: Consult the ceiling fan's manufacturer for specifications or model numbers to identify compatible light kit options.
- Evaluate wattage limits: Adding a light kit may increase the load on your ceiling fan. Be sure to review the wattage limits to avoid overloading the system.
If your fan doesn't meet these requirements, you may want to explore universal light kits that fit a variety of models, but remember, compatibility must still be confirmed.
Taking these steps will help you add a compatible light kit safely and effectively.

72 inch Ceiling Fans with Lights,Large Ceiling Fan with Light and Remote Control, Dimmable, 3CCT, Quiet, Black Modern Ceiling fan For Living Room, Bedroom, Kitchen, Patio, Farmhouse, Indoor/Outdoor
Ceiling Fan with Light: Decorate your home with Amico ceiling fan! While bringing you coolness and comfort, it...
As an affiliate, we earn on qualifying purchases.
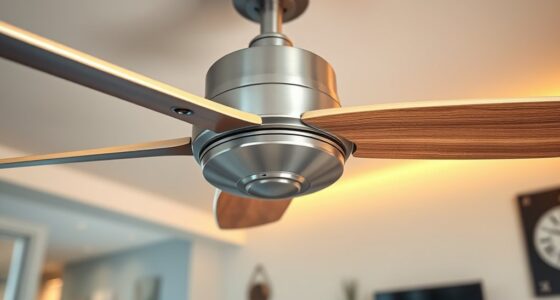
Selecting the Right Light Kit

Choosing the right light kit for your ceiling fan is vital for both functionality and style. Start by verifying compatibility; check if your fan has a housing assembly with capped wires inside. This indicates that it can accommodate a light kit.
When selecting, consider the variety of light kits available, including single, double, or triple bulb options, which cater to your lighting needs and aesthetic preferences.
If you want versatility, look into universal light kits that fit most ceiling fan models. However, always double-check the specific model's compatibility with your fan's design and electrical specifications.
It's important to pay attention to wattage limits as well. Exceeding these limits can overload the electrical system, posing safety risks.
Additionally, measure the diameter of your ceiling fan's attachment point and note the screw hole locations. This guarantees the light kit can be properly mounted and secured.

addlon Ceiling Fans with Lights, 42 Inch Low Profile Ceiling Fan with Light and Remote Control, Flush Mount, Reversible, 3CCT, Dimmable, Quiet, Black Small Ceiling Fan for Bedroom Indoor/Outdoor Use
Ceiling Fan with Light: Bring more than just wind and light, but comfort! addlon modern ceiling fan, with...
As an affiliate, we earn on qualifying purchases.
Step-by-Step Installation Process

Installation of a light kit can transform your ceiling fan, enhancing both its functionality and aesthetic appeal. Here's a straightforward step-by-step process to guide you through the installation:
- Verify Compatibility: Before starting, check that your ceiling fan has a housing assembly compatible with the light kit. Turn off the power at the circuit breaker for safety.
- Access the Wiring: Remove the decorative center plate or cap from the ceiling fan. This will give you access to the wiring. Typically, the white wire is for neutral, and the black wire is for power.
- Connect the Wires: Attach the light kit wires to the ceiling fan's wiring using wire nuts. If your fan has a dedicated wire for the light, make sure to connect the blue wire (for the light) properly.
- Secure the Fixture: Align and attach the light assembly to the ceiling fan according to the manufacturer's instructions. Use screws to verify everything is tightened and secure to prevent any movement.
Once done, restore power at the circuit breaker, and you're ready to enjoy your newly enhanced ceiling fan!
Testing Your Installation

Once you've finished the installation, restore power at the circuit breaker to test your new light kit and ceiling fan together.
Use the pull chain or wall switch to guarantee both the fan and light respond correctly.
Keep an ear out for any unusual sounds or flickering lights, as these could signal potential issues that need addressing.
Power Restoration and Testing
After you've finished adding the light kit to your ceiling fan, it's important to restore power and test your installation. Follow these steps to guarantee everything's working correctly:
- Restore Power: Flip the circuit breaker back on to supply power to your fan and light.
- Test Functionality: Pull the chain or use the wall switch to check if both the fan and light operate smoothly.
- Inspect Wiring Connections: If the light doesn't turn on, inspect the wiring connections, focusing on the blue wire designated for the light fixture. Confirm all connections are secure.
- Monitor for Issues: Keep an ear out for unusual sounds or watch for flickering lights, which could indicate loose connections or electrical problems.
Before wrapping up, make certain every component is securely attached and functioning properly.
This power restoration and testing phase is vital for safety and guarantees your new light kit enhances your ceiling fan's functionality.
Enjoy your newly upgraded fixture!
#
Common Issues and Solutions
Commonly, issues can arise when testing your new light kit installation, but most can be easily resolved with a few troubleshooting steps. If your light kit doesn't illuminate, start by checking the circuit breaker. Make sure power is supplied to both the ceiling fan and the light fixture.
Next, confirm that the light bulbs are properly installed and functional. Inspect all wiring connections for any loose or damaged wires, particularly the blue wire connected to the light kit. If that seems fine, try bypassing the wall switch by connecting the light fixture directly to a power source. This will help you determine if the problem lies within the switch or the light fixture itself.
Watch for any flickering or dimming lights, which may indicate compatibility issues with the wattage of the bulbs used. If problems persist, consult the manufacturer's instructions for specific troubleshooting related to your ceiling fan model.
## Common Issues and Solutions

Installing a light kit on a ceiling fan can sometimes lead to frustrating issues if you're not prepared. To help you navigate these potential problems, here are some common issues and their solutions:
- Inadequate Voltage: If your light fixtures aren't working, check the voltage at the light leads. Improper wiring connections, like failing to connect the blue wire designated for the light, can cause this.
- Wiring Connections: Verify you connect wiring properly—typically, you should connect black to black and white to white. Loose or damaged connections can lead to failure.
- Circuit Breaker Check: If the light doesn't function after installation, inspect the circuit breaker. It may have tripped, cutting power to your light kit.
- Additional Wiring Needs: Sometimes, additional wiring is necessary, especially for dual switch installations. Be sure to recognize any extra wires in your housing assembly.
Professional Help or DIY?

When it comes to adding a light kit to your ceiling fan, you might wonder whether to tackle the project yourself or hire a professional. If you're comfortable with electrical work and have experience with wiring connections, a DIY approach might seem appealing.
However, keep in mind that many users run into potential issues during installation, often struggling with wiring connections or misinterpreting installation instructions.
Enlisting professional help can be a wise choice, especially if you're unsure about any part of the process. An electrician brings expertise that can prevent mistakes, like connecting the wrong wires or overloading the fan's electrical system.
Safety is paramount, and the risk of electrical shocks or malfunctions during a DIY installation shouldn't be underestimated.
Hiring a handyman can also take the stress off your shoulders, allowing you to enjoy your new ceiling fan light kit without worry.
Ultimately, if you feel uncertain or encounter complications, investing in professional help can provide peace of mind and guarantee compliance with local codes. Your safety and the functionality of your ceiling fan are worth it!
Frequently Asked Questions
Do All Light Kits Fit All Ceiling Fans?
Not all light kits fit all ceiling fans. You need to check if your fan has the right housing assembly designed for a light kit.
Each fan model often has specific options recommended by the manufacturer, so confirming your fan's model number is key.
While universal kits exist, they mightn't fit perfectly.
Always consider the wattage limits and electrical capacity to avoid overloading your fan when selecting a light kit.
Can You Add a Light Kit to a Ceiling Fan?
Imagine your ceiling fan as a canvas, waiting for the perfect stroke of light to bring it to life. You can add a light kit to your ceiling fan, but first, you'll want to check for compatibility.
Look for a housing cap at the center and verify you've got the necessary wires ready to connect.
Can You Add a Remote Kit to Any Ceiling Fan?
You can't just add a remote kit to any ceiling fan.
It's essential to check the manufacturer's specifications for compatibility first. Many modern fans have built-in remote capabilities, while older ones might need extra wiring or a receiver.
You'll find universal kits available, but make sure they match your fan's wiring.
Always turn off power at the circuit breaker before you start the installation to keep things safe and straightforward.
How Much Does It Cost to Install a Ceiling Fan With Light Kit?
Installing a ceiling fan with a light kit typically costs between $150 to $500.
You'll spend around $20 to $50 for the light kit itself, while installation can range from $75 to $150 per hour if you hire a professional.
If you've got the skills and tools, doing it yourself can save you money.
Keep in mind that additional electrical work may also add to your overall expenses.
Conclusion
To summarize, adding a light kit to your ceiling fan can brighten up your space and boost your style. By following the steps outlined and ensuring compatibility, you can create a cozy, charming atmosphere in your home. Whether you tackle the task yourself or seek a skilled specialist, you'll celebrate your ceiling fan's newfound functionality. So, don't hesitate—let your lighting dreams take flight and transform your room into a radiant retreat!