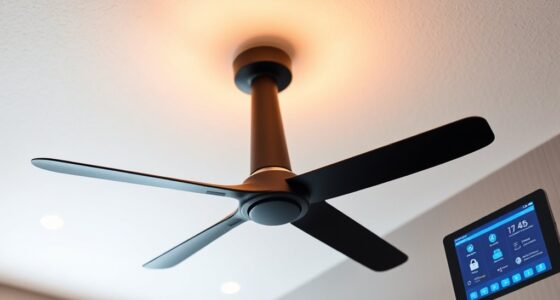

To link your ceiling fan to IFTTT for custom triggers, start by checking if your fan supports smart home integration or works with a compatible hub. Then, create an IFTTT account and connect your devices through supported services. With the proper setup, you can create custom applets that control your fan based on location, temperature, or time. Keep exploring to learn how to optimize your automation for comfort and energy savings.
Key Takeaways
- Verify ceiling fan compatibility with smart home hubs and IFTTT support before integration.
- Connect the fan to a compatible smart hub or device that supports IFTTT automation.
- Create custom IFTTT applets using triggers like temperature, motion, or time for tailored fan control.
- Use voice assistants linked via IFTTT to activate or adjust the fan with specific commands.
- Test and refine applets to ensure reliable operation and seamless integration with your smart home setup.

Geinself 52 Inch Smart Ceiling Fans with Lights, Compatible with Alexa/Remote/APP, Downrod Mount, Reversible DC Motor, High CFM, 5 Blades, 6 Speeds, 3CCT, Dimmable, for Bedroom, Living Room, Black
Smart Control, Hands Free Comfort – Upgrade your home with our smart ceiling fan with light, offering three…
As an affiliate, we earn on qualifying purchases.
As an affiliate, we earn on qualifying purchases.
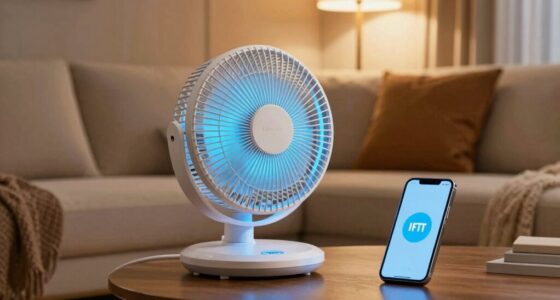
Understanding IFTTT and Its Capabilities for Fans

IFTTT (If This Then That) is a powerful platform that connects various smart devices and services, allowing you to automate your home. With IFTTT, you can set up custom actions triggered by voice commands or remote controls, making your ceiling fan smarter and more convenient. For example, you can create a trigger so saying a specific phrase turns on or adjusts your fan. You don’t need to manually control the fan each time; IFTTT handles it seamlessly. This platform supports numerous integrations, so you can link your fan to popular voice assistants like Alexa or Google Assistant. By understanding IFTTT’s capabilities, you *gain access to* endless possibilities for automating your fan, enhancing comfort, and simplifying your daily routines. Additionally, email marketing techniques can be employed to keep your smart home setup updated and optimized for your preferences. Exploring smart home automation options can further enhance your experience by integrating other devices for a fully interconnected environment, especially as Layering improves system organization and efficiency.

53T Smart Wi-Fi Ceiling Fan Remote Control Kit, 3 Fan Speed & Light Dimmer,Compatible with Alexa & Google Home Smart Life APP
【Smart Wi-Fi Version】: Remote / Smart Life APP / Voice – 3 ways to control your ceiling fan…
As an affiliate, we earn on qualifying purchases.
As an affiliate, we earn on qualifying purchases.
Checking Compatibility of Your Ceiling Fan and Smart Devices

Before you attempt to connect your ceiling fan to IFTTT, it’s essential to verify whether your fan and smart devices are compatible. Not all ceiling fan models work seamlessly with smart home systems, so check their specifications first. Additionally, ensure your smart device brands support IFTTT integration. Here are some tips to help you determine compatibility:
- Review your ceiling fan models’ specifications for smart home compatibility and whether they support smart device integration.
- Confirm the smart device brands (like Philips Hue, TP-Link, or Wemo) support IFTTT.
- Look for existing integrations or app support for your smart devices.
- Check if your hub or interface can connect with both your fan and smart devices.
- Read user reviews for real-world compatibility insights.
- Verify if your compatible smart hub can connect multiple devices for seamless automation.
This step saves you time and frustration, guaranteeing a smooth setup process.

Smart WiFi Fan Switch Ceiling Fan and Light Remote Control Kit, WiFi Controller Compatible with Alexa Google, Phone APP Control, No Hub Required, Universal Ceilingfan Light Remote Control
Universal Remote for Ceiling Fan with Light – Simply adds this smart fan controller to your ceiling fan…
As an affiliate, we earn on qualifying purchases.
As an affiliate, we earn on qualifying purchases.
Setting Up Your Smart Home Hub or Interface

To successfully connect your ceiling fan to IFTTT, you first need to set up your smart home hub or interface. This step guarantees your devices communicate smoothly and respond to voice commands efficiently. Start by configuring your hub’s app, linking your ceiling fan, and enabling any necessary integrations. Once set up, you can use voice commands through platforms like Alexa or Google Assistant to control your fan, making adjustments hands-free. Proper setup also helps maximize energy savings by allowing you to automate fan operation based on time, occupancy, or weather conditions. Device compatibility is crucial for ensuring your ceiling fan works seamlessly within your smart home ecosystem. Clear, organized configuration of your hub ensures reliable triggers and responses, giving you seamless control and optimizing your smart home’s efficiency. Additionally, maintaining an understanding of biodiversity principles can inspire eco-friendly choices in your smart home setup, promoting sustainability and environmental benefits.
Smart WiFi Fan Switch Ceiling Fan and Light Remote Control Kit, WiFi Controller Compatible with Alexa Google, Phone APP Control, No Hub Required, Universal Ceilingfan Light Remote Control
Universal Remote for Ceiling Fan with Light – Simply adds this smart fan controller to your ceiling fan…
As an affiliate, we earn on qualifying purchases.
As an affiliate, we earn on qualifying purchases.
Creating an IFTTT Account and Connecting Your Devices

To get started, you need to create an IFTTT account by signing up on their website or app. Once you’re signed in, connect your ceiling fan device by adding its service and authorizing access. This setup guarantees your fan can respond to the automated triggers you create. Additionally, you might want to explore device integration options to ensure smooth operation across your smart home ecosystem. Remember, maintaining clear privacy and boundaries is essential when integrating smart devices with your personal space. Additionally, ensure your account has a strong password, leveraging the password strength features provided by your login platform for added security.
Setting Up IFTTT Account
Creating an IFTTT account is the first step to linking your ceiling fans and other smart devices. Once you sign up, you can easily set up voice commands and automate actions across your devices. To get started:
- Use your email or social media accounts for quick registration
- Verify your account via email to activate access
- Connect compatible smart devices for seamless hardware integration
- Enable IFTTT applets for specific triggers and actions
- Explore the dashboard to customize your automation setup
Connecting Ceiling Fan Devices
After setting up your IFTTT account, the next step is connecting your ceiling fan devices. This allows you to enhance lighting automation and enable voice command integration seamlessly. To do this, navigate to the “Connections” page and select your ceiling fan brand or compatible device. Follow prompts to authorize access and link it to your IFTTT account. Once connected, you can create custom triggers and actions, like turning on the fan with a voice command or adjusting speed based on lighting conditions. Here’s an overview of common devices:
| Device Type | Example Features |
|---|---|
| Ceiling Fans | Speed control, remote, voice commands |
| Smart Switches | Manual and automated control |
| Light Fixtures | Dimmable lighting automation |
| Voice Assistants | Alexa, Google Assistant integration |
| Sensors | Motion, light sensors for automation |
Additionally, integrating home automation features can significantly enhance your living space by enabling more personalized control over your ceiling fan and other connected devices. Smart home integration can help coordinate your ceiling fan with other devices for a more seamless experience, especially when utilizing device linking features.
Finding or Creating Suitable Applets for Fan Control

You can start by exploring existing applets designed for fan control, which often work out of the box. If those don’t fit your needs, consider creating custom applets tailored to your routines. Just make sure your devices are compatible to guarantee smooth operation.
Existing Applet Options
Are there existing IFTTT applets that can help you control your ceiling fan? Absolutely. You might find ready-made applets that respond to voice commands, adjusting fan speed or turning the fan on and off. These applets can sync with smart home platforms, making control seamless. Here are some options to explore:
- Voice command triggers for turning the fan on or off
- Fan speed adjustments based on weather conditions
- Turning the fan off when you leave home
- Dimming lights when you activate the fan
- Temperature-based fan control with smart sensors
- Using comfort and support solutions to optimize your environment can also enhance overall well-being.
- Leveraging automation technology can help integrate your ceiling fan with other smart devices for more comprehensive control. Incorporating home automation principles can also improve energy efficiency and convenience.
Custom Applet Creation
Creating custom IFTTT applets for your ceiling fan allows you to tailor control exactly to your needs, especially when ready-made options don’t fit your setup. By designing your own applets, you can enhance smart home integration and guarantee device compatibility, even with unique or less common devices. Start by identifying the trigger and action you want—like turning on the fan when you arrive home or adjusting speed based on room temperature. Use IFTTT’s platform to connect your fan’s smart features with other devices or services. Custom applet creation gives you flexibility, enabling you to set specific conditions and responses that suit your lifestyle. This approach ensures seamless control, making your smart ceiling fan truly work for you. Additionally, understanding the comparative advantage of your devices can help optimize their integration and performance within your smart home system. Recognizing the functions of juice cleansing can also inform how you schedule and automate routines that support your wellness goals alongside your smart home setup. Proper security protocols should be implemented to protect your smart devices from unauthorized access, ensuring your automation remains safe and reliable.
Compatibility Considerations
When setting up custom applets for your ceiling fan, guaranteeing compatibility between devices and platforms is key. You need to take into account brand compatibility and protocol support to avoid frustration. Some fans work seamlessly with popular smart home platforms, while others may require specific hubs or bridges. It’s vital to verify if your fan’s brand supports IFTTT or compatible protocols like Wi-Fi, Zigbee, or Z-Wave. Failing to verify these details can lead to failed automations or limited functionality. Additionally, reviewing device compatibility ensures your setup will work as intended and simplifies troubleshooting. Confirm if your fan’s brand supports IFTTT directly, as many leading brands now offer native integration for easier setup. Check if the fan uses compatible protocols like Zigbee or Z-Wave. Guarantee your smart home hub supports your fan’s protocol. Look for existing applets tailored to your fan’s brand. Take into account creating custom applets if native options are unavailable. It’s also helpful to explore compatibility considerations to ensure your devices will work together efficiently.
Configuring Triggers Based on Location, Sensors, or Time

You can tailor your ceiling fan’s operation by configuring triggers based on your location, sensors, or time. For example, using your phone’s GPS, you can set the fan to turn off when you leave your house, saving energy. Sensors like temperature or motion detectors can trigger the fan to activate only when needed, enhancing energy savings and comfort. Time-based triggers allow you to schedule the fan to turn on or off at specific hours, ensuring ideal airflow throughout the day. These configurations can also work with voice commands, enabling you to control your fan hands-free. By customizing triggers with location, sensors, or time, you make your ceiling fan smarter, more efficient, and better aligned with your daily routine.
Customizing Actions for Your Ceiling Fan

Customizing actions for your ceiling fan allows you to tailor its behavior to your preferences and routines, making it more efficient and convenient. With IFTTT, you can set specific commands to control fan blade rotation or adjust fan speed control based on triggers. For example, you might create an automation to slow the fan when you leave the room or speed it up during hot afternoons. You can also set actions to turn the fan off at night or change rotation direction for better airflow. These customizations let you optimize comfort effortlessly.
Customize your ceiling fan with IFTTT for effortless comfort and convenience.
- Adjust fan speed automatically when temperature changes
- Change fan blade rotation direction for different seasons
- Turn the fan on or off with your voice command
- Schedule fan speed control during specific hours
- Sync fan actions with other smart devices in your home
Testing and Optimizing Your Automation Setup

To make sure your automation works seamlessly, it’s essential to thoroughly test and fine-tune your setup. Start by adjusting fan speed controls through IFTTT triggers, ensuring they respond correctly. Test remote control commands to verify they activate the desired automation. Observe how the system reacts to different scenarios, like changing the fan speed or turning it on/off. Use the table below to track your tests:
| Test Scenario | Expected Outcome | Actual Result |
|---|---|---|
| Increase fan speed | Fan speed increases to desired level | Works as expected |
| Remote off command | Fan turns off via remote control | Response is consistent |
| Decrease fan speed | Fan speed decreases appropriately | Functionality is smooth |
| Trigger via IFTTT | Fan responds to custom trigger | Adjustments needed for consistency |
Fine-tune based on these results for reliable automation.
Tips for Maximizing Comfort and Energy Efficiency

Maximizing comfort and energy efficiency with your ceiling fan involves strategic use of automation and settings. By employing ventilation strategies and airflow optimization, you can create a more comfortable environment while reducing energy consumption. Use IFTTT triggers to adjust fan speed based on room temperature, occupancy, or time of day, ensuring ideal airflow. To get the most out of your setup, consider these tips:
- Schedule fans to run during peak heat hours for natural cooling
- Use motion sensors for automatic fan activation when rooms are occupied
- Set fans to reverse direction in winter for better airflow circulation
- Combine with smart thermostats to balance temperature and airflow
- Keep blades clean for consistent airflow and noise reduction
Implementing these strategies helps you enjoy comfort without wasting energy.
Frequently Asked Questions
Can I Control Multiple Ceiling Fans With a Single IFTTT Applet?
You can control multiple ceiling fans with a single IFTTT applet through multi fan control setup. However, applet customization is key—ensure each fan is compatible and connected to your smart home system. You might need to create individual triggers for each fan and then combine them in one applet, allowing you to turn all fans on or off simultaneously. Just check that your fans support the necessary integrations for smooth operation.
How Do I Troubleshoot Connectivity Issues Between My Fan and IFTTT?
To troubleshoot connectivity issues between your fan and IFTTT, first check for signal interference from other devices nearby. Make certain your Wi-Fi network is stable and your fan’s firmware is current. Restart your Wi-Fi router, fan, and the device running IFTTT. If problems persist, reconnect the fan to Wi-Fi, reauthorize IFTTT, and verify your applet settings. This helps improve communication and resolve issues quickly.
Are There Privacy Concerns When Using Location-Based Triggers?
When using location-based triggers, you might worry about data privacy and location tracking. It’s important to know that many services collect and store your location data, which could potentially be accessed or misused. To protect your privacy, review app permissions, enable only necessary data sharing, and consider turning off location tracking when it’s not needed. Being aware helps you control your data privacy and minimizes risks associated with location tracking.
Can I Integrate Voice Commands With My Ifttt-Controlled Ceiling Fan?
You can definitely integrate voice command integration with your IFTTT-controlled ceiling fan, provided your fan and voice assistant are compatible with your smart home setup. By linking your voice assistant, like Alexa or Google Assistant, to IFTTT, you create seamless smart home compatibility. Just make sure your fan supports voice control or is connected through a compatible smart device, enabling you to turn it on or off effortlessly with voice commands.
What Are the Best Practices for Automating Fan Speed Adjustments?
Imagine you’re a maestro conducting a symphony of comfort. To automate fan speed adjustments, set specific triggers like temperature changes or time of day. Prioritize energy efficiency by avoiding over-frequent adjustments. Always consider safety considerations—ensure your fan’s wiring and controls are compatible with automation. Test your setup thoroughly to prevent mishaps. Regularly review and refine your triggers to keep your environment comfortable, safe, and energy-smart.
Conclusion
By linking your ceiling fan to IFTTT, you activate personalized comfort and energy savings. While automation offers convenience, it also challenges your awareness of energy use and environmental impact. Embrace the balance between technology and mindfulness — let your smart setup serve your lifestyle without losing sight of sustainability. With thoughtful customization, your fan becomes more than just a device; it’s a partner in creating a smarter, greener home.