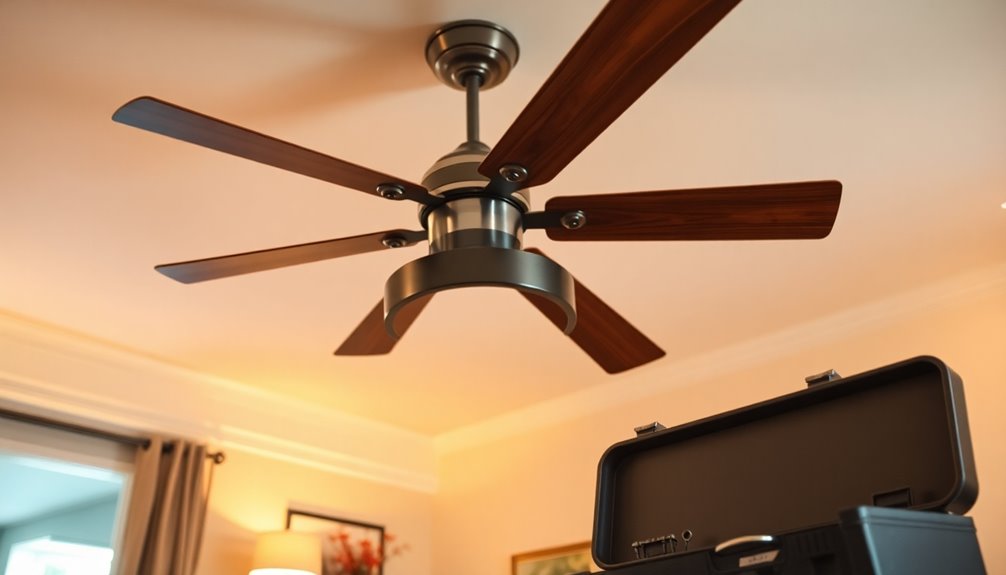
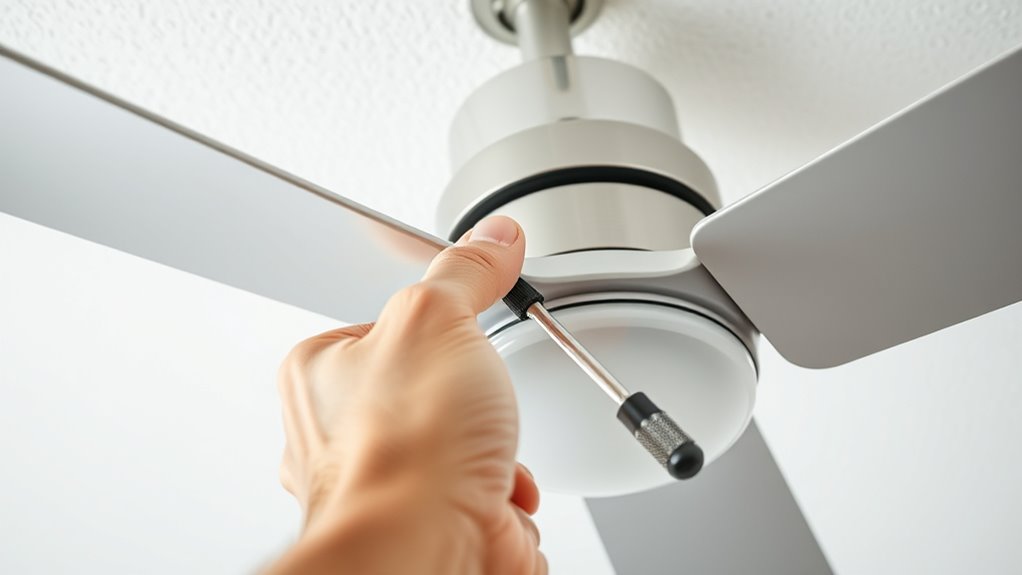
To tighten loose ceiling fan blades, turn off the fan and disconnect the power for safety. Remove the canopy cover to access the blades and check that all screws and brackets are secure using a Phillips-head screwdriver. If needed, re-align the blades so they are parallel to the ceiling and tighten all fasteners evenly. Perform a quick test to see if wobbling stops. If you want detailed steps, there’s more to explore.
Key Takeaways
- Turn off the fan and disconnect power before inspecting or tightening blades for safety.
- Check and tighten all screws securing blades to prevent wobbling and ensure stability.
- Inspect blades for damage or warping, replacing severely damaged ones for proper balance.
- Re-align blades to ensure they are parallel to the ceiling and evenly spaced.
- Test the fan after tightening to ensure smooth operation and address any remaining wobble.

PATIKIL 20Pcs Ceiling Fan Blade Screws, 1/4"-20 x 3/8 Carbon Steel Phillips Pan Motor Replacement Screw for Lighting Ceiling Fan, Copper
These industrial-grade ceiling fan blade screws are precision-engineered fasteners designed to eliminate blade wobble and motor vibration. Featuring…
As an affiliate, we earn on qualifying purchases.
As an affiliate, we earn on qualifying purchases.
Safety Precautions Before Starting the Repair

Before you begin tightening ceiling fan blades, it’s essential to prioritize safety. First, turn off the fan and disconnect it from the power source at the circuit breaker to prevent electrical shock.
Always handle hardware carefully and ensure tools like screwdrivers are within reach before starting. Use a sturdy ladder or step stool to reach the fan safely, making sure it’s stable before working.
Wear safety goggles to protect your eyes from dust, debris, or falling hardware during the process. Confirm that the fan’s mounting bracket and support system are properly secured and rated for the weight. Additionally, understanding projector safety precautions can help prevent electrical or structural issues during repair.
Taking these precautions helps prevent accidents and injuries, ensuring you work safely and efficiently. Proper safety measures are crucial for a successful repair. Ensuring the support system of the fan is intact can prevent further damage during the repair process. Being aware of structural stability can further enhance safety during your repair efforts. Verifying the electrical connections can help avoid potential hazards. Safety always comes first when repairing ceiling fans.

YFANITI 20 Pcs Ceiling Fan Balancing Kit, 5 Sets High Calibration Blade Balance Tool Including 5 Pcs Resilient Clips and 15 Pcs Metal Self-Adhesive 3G Weight,Fan Balancing Kit
Efficient Wobble & Noise Reduction:The Ceiling Fan Balancing Kit includes a balance clip and 3 self-adhesive 3G metal…
As an affiliate, we earn on qualifying purchases.
As an affiliate, we earn on qualifying purchases.
Gathering the Necessary Tools and Materials

Start by collecting the essential tools, like a Phillips-head screwdriver, a stepladder, and a flashlight, to access and inspect the fan blades safely. Next, gather materials such as a measuring tape and replacement screws in case you need them. Having everything ready guarantees a smooth and efficient tightening process. Additionally, understanding the benefits of proper maintenance can help extend the lifespan of your ceiling fan and ensure optimal performance. Regular upkeep can prevent issues like loose blades, reducing the risk of damage or accidents. Maintaining your fan also contributes to energy efficiency, which can lower utility bills and improve overall home comfort. Proper cleaning and routine checks, including inspecting for wire damage, can further enhance the indoor air quality, making your living space healthier.
Essential Tools Needed
To effectively tighten ceiling fan blades, you’ll need a few essential tools and materials. A Phillips-head screwdriver is vital for loosening and tightening the screws that secure the blades to the mount. A sturdy step ladder or chair guarantees safe access to high or hard-to-reach fans. Additionally, a measuring tape helps verify that the blades are evenly spaced and properly aligned for smooth operation. You may also want a clean cloth or microfiber towel to wipe dust from the blades before tightening, guaranteeing a secure fit. Proper blade alignment is crucial for balanced and safe fan operation. Ensuring the correct blade alignment is crucial for balanced and safe fan operation. Having these tools ready will make the task safer, faster, and more effective. Regularly checking your fan’s balance and stability can prevent wobbling and extend its lifespan.
Material Preparation
Gathering the right tools and materials guarantees a safe and efficient ceiling fan blade tightening process. Start with a Phillips-head screwdriver to tighten or replace fasteners securing the blades. Have an adjustable wrench nearby to handle any hardware adjustments. Use a step ladder to safely access the blades. Prepare a clean cloth or microfiber towel to wipe dust and debris from the blades before tightening. Keep replacement screws or blade mounting hardware on hand in case the original fasteners are stripped or damaged. Use a measuring tape or ruler to verify the proper blade height and alignment after tightening. Additionally, consulting industry standards can ensure you follow best practices for safe and effective maintenance. Regular inspection can help prevent security vulnerabilities related to loose components, and understanding anime movies can provide a relaxing break from maintenance tasks. Staying informed about safety precautions can further reduce risks during the process. Incorporating automotive water spot removers techniques can also help maintain the appearance of ceiling fans exposed to outdoor elements.

KALIONE Ceiling Fan Blade Balancing Kit Including Fan Balancing Clips and 12pcs Metal Self-Adhesive 3G Weight Practical Fan Balance Kit for Ceiling Fan Weight Balancing 4pcs
Package Content: You will receive 4 sets of fan balancing kit, enough quantity meets all your needs.
As an affiliate, we earn on qualifying purchases.
As an affiliate, we earn on qualifying purchases.
Turning Off and Preparing the Fan for Inspection
Before inspecting your ceiling fan, make sure it’s completely turned off and disconnected from the power source. This step guarantees safety during your inspection.
Wait at least 10 minutes after turning off the fan to allow the motor and blades to cool and come to a complete stop.
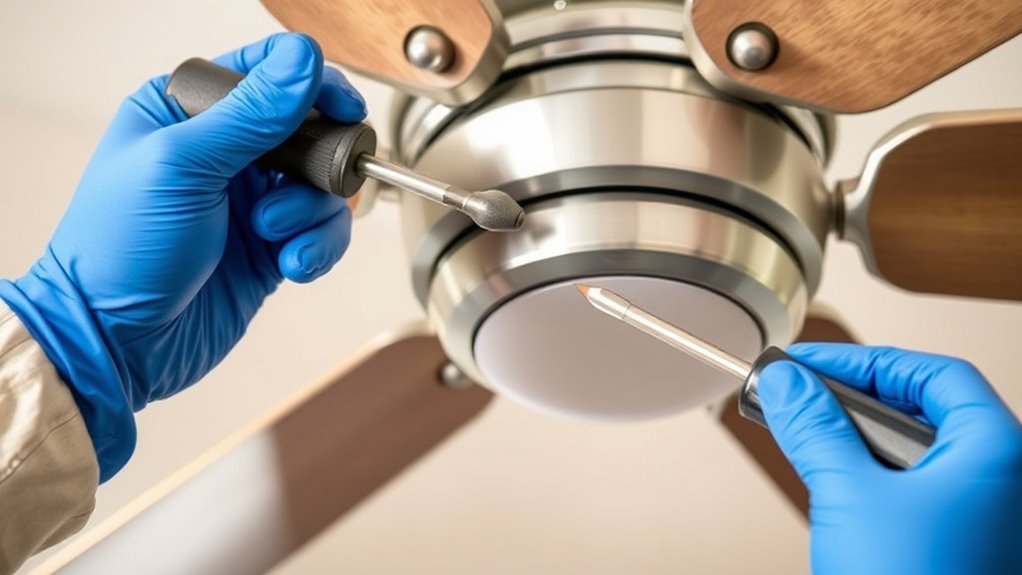
Use a step stool or ladder to reach the fan comfortably without straining. Once you’re at a safe height, carefully remove the canopy cover to expose the mounting hardware and blade attachments.
Before proceeding, check these key points:
- Turn off the fan and disconnect power
- Wait for the blades and motor to cool down
- Use a step stool for better access
Inspect all visible screws and fasteners on the fan blades, mounting hardware, and brackets for any looseness or missing parts. Being aware of electrical safety procedures is crucial if you plan to perform any repairs or adjustments beyond simple tightening. Additionally, consulting the user manual can provide specific guidance tailored to your fan model.
It’s also helpful to familiarize yourself with home maintenance best practices to ensure safe and effective repairs. This preparation sets the foundation for a safe, effective tightening process.
It’s also helpful to review the key steps in the divorce process for legal matters related to property and custody, ensuring you understand all procedural requirements.

Westinghouse 22-Inch Replacement Fan Blades for 52-Inch Ceiling Fans
Compatible with 52" Fans: Designed to fit most standard 52-inch ceiling fans, ensuring a seamless replacement
As an affiliate, we earn on qualifying purchases.
As an affiliate, we earn on qualifying purchases.
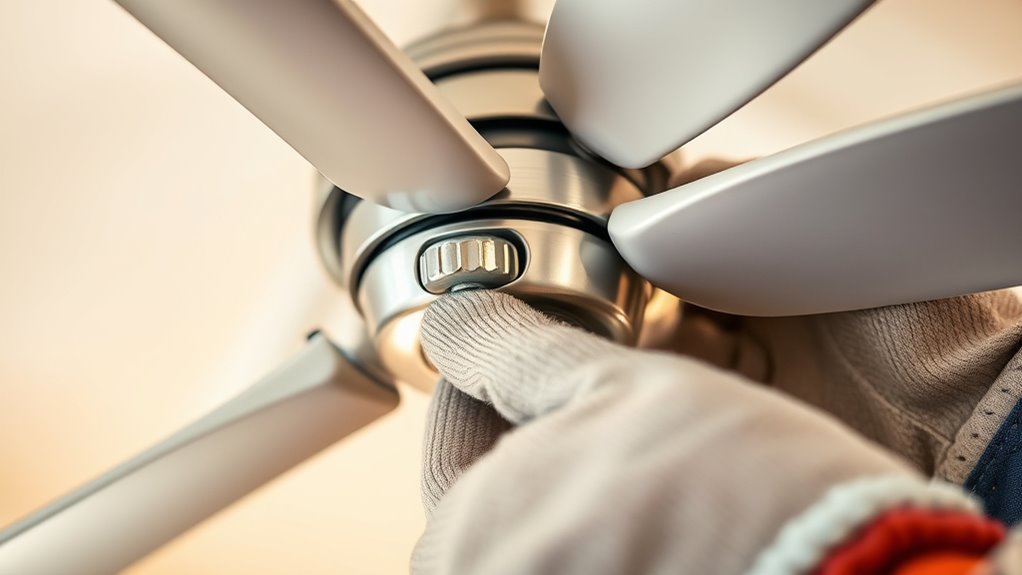
Inspecting the Blade Attachments and Hardware
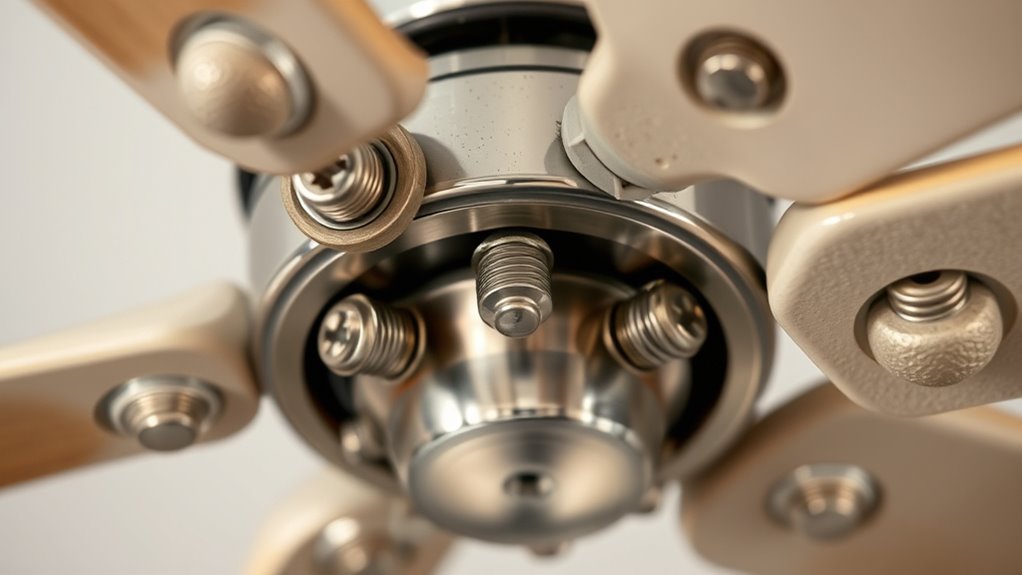
When inspecting the blade attachments and hardware, start by making certain all screws securing the blades to the motor or blade irons are tight with a Phillips-head screwdriver. Next, inspect each blade bracket or mounting plate for signs of looseness, corrosion, or damage, tightening or replacing as needed. Confirm that the blade arms or holders are firmly attached to both the blades and the motor, avoiding wobbling. Also, verify that the blade screws are properly threaded and not stripped, replacing any damaged ones for a secure fit. Finally, check the electrical box and mounting hardware to make certain the entire fan assembly is securely anchored. Use the following table to guide your inspection:
| Component | What to Look For | Action Needed |
|---|---|---|
| Screws | Looseness or damage | Tighten or replace |
| Blade brackets | Corrosion or damage | Tighten or replace |
| Blade arms | Wobbling or loose attachment | Secure firmly |
| Mounting hardware | Loose or damaged | Tighten or replace |
| Attachment points | Stripped or faulty | Repair or replace |
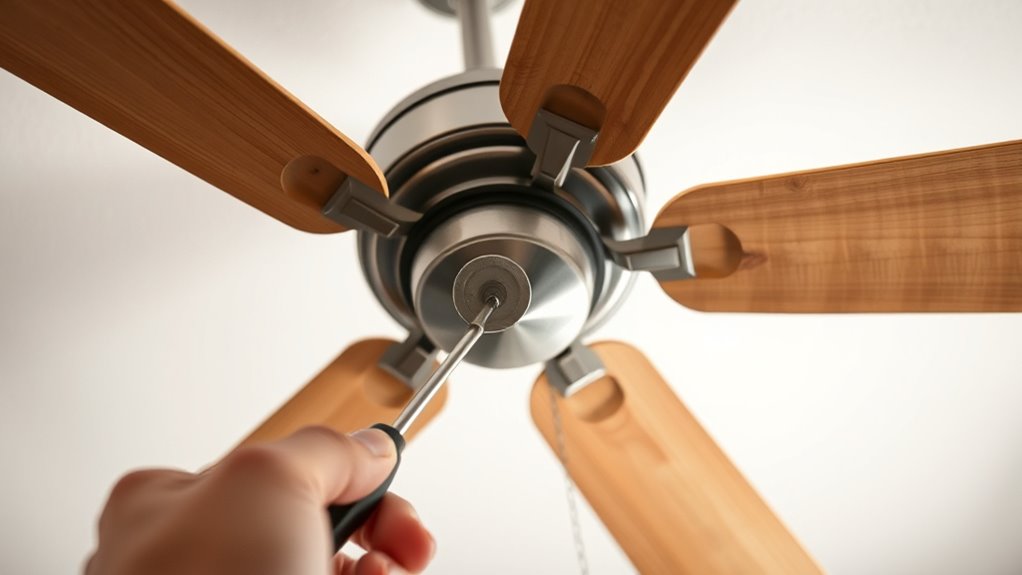
Tightening Loose Screws and Brackets Securely

To guarantee your ceiling fan operates smoothly, it’s essential to tighten all loose screws and brackets securely. Start by inspecting the screws connecting the fan blades to the blade irons or motor spindle. Use a Phillips-head screwdriver to tighten them just enough—avoid over-tightening.
Next, check the mounting brackets attached to the electrical box, tightening any loose mounting screws or bolts to prevent wobbling. Also, examine the blade brackets or holders for signs of wear or corrosion, and tighten their screws to keep the blades aligned.
Remember to verify that all canopy cover screws are tight, as loose screws here can cause instability. Regularly inspecting and tightening these fasteners ensures your fan remains secure, quiet, and wobble-free.
Checking for Damaged or Warped Blades
Have you noticed your ceiling fan wobbling or making unusual noise? Check for damaged blades or warped blades during a visual inspection. Place a straightedge or level across each blade to spot uneven warping—warped blades typically deviate more than 1/4 inch.
Look closely at the edges for cracks, splits, or missing pieces, which indicate blade damage and likely require replacement blades. If the warp is minor, you might gently straighten the blades, but severely warped blades should be replaced for safety and proper balance.
Use a ruler or yardstick to measure deviations and ensure all blades are aligned. Addressing damaged or warped blades promptly helps restore fan stability and prevents further issues.
Re-aligning and Adjusting Blade Positions if Needed

Start by checking if each blade is properly aligned and parallel to the ceiling, making adjustments as needed.
Use a straightedge to measure and guarantee all blades are at equal heights, and tighten the fasteners securely.
If any blades are warped or uneven, replace or readjust them to keep the fan balanced.
Check Blade Alignment
Ensuring your ceiling fan blades are properly aligned is essential for smooth operation and minimal wobbling. To check the blade alignment, measure the distance from the ceiling to each blade tip; they should be within 1/8 inch of each other.
If you notice unevenness, gently adjust the blade brackets by loosening the mounting screws, repositioning the blades, and tightening the screws securely. Use a level or straightedge to confirm all blades are parallel and aligned with each other before tightening fully.
Remember:
- Check for loose or bent blades that may need realignment
- Adjust mounting screws carefully to maintain proper blade position
- Replace warped blades to ensure correct alignment and balance
Adjust Blade Angles
If you notice wobbling or noise despite aligned blades, adjusting the blade angles can improve fan stability. Properly aligned blades should have a consistent tilt, typically between 10 to 15 degrees. To re-align, loosen the blade screws, then adjust each blade to match the angle of the others using a protractor or angle gauge. Ensure the blades are straight and even to prevent loose blades or uneven blade angles from affecting performance. Once aligned, tighten the blade screws securely. Warped or bent blades should be replaced or straightened for ideal stability. Regularly checking and adjusting blade angles during maintenance helps maintain airflow and reduces stress on the motor.
| Blade | Current Angle | Correct Angle |
|---|---|---|
| Blade 1 | 12° | 12° |
| Blade 2 | 14° | 13° |
| Blade 3 | 16° | 13° |
| Blade 4 | 11° | 12° |
| Blade 5 | 13° | 13° |
Secure Blade Fasteners
When securing ceiling fan blades, it’s important to tighten the fasteners properly to prevent wobbling and noise. Loose blade fasteners can cause fan wobble and vibrations, so use a screwdriver to tighten the screws connecting the blades to the mounting hardware until they’re snug and flush.
If the blades aren’t level, you may need to re-align them: loosen the fasteners slightly, adjust the blade position, then retighten to secure blades firmly. Always check that screws are tightened to the manufacturer’s recommended torque to avoid stripping threads or over-tightening.
Inspect the mounting hardware for damage or warping before retightening. Properly secured blades with correct blade alignment ensure quiet, stable operation and extend your fan’s lifespan.
- Tighten screws until snug, not over-tightened
- Check for damage in mounting hardware
- Adjust blade position for levelness
Testing the Fan for Stability and Wobble Reduction

To effectively test your ceiling fan for stability and wobble reduction, start by turning it on to high speed and observing how it behaves. Check if the wobble decreases or persists, which indicates whether tightening the blades has improved balance.
Measure the blade distance from the ceiling using a yardstick or ruler to identify unevenness that may cause fan wobbling. After tightening the blades, run the fan at full speed for 10-15 seconds to assess if wobble reduction has occurred.
To pinpoint the problematic blade, attach a balancing clip or tape coins to the blades and observe which one causes the most wobbling. Continuously monitor the fan’s motion after adjustments to guarantee it runs smoothly, quietly, and with minimal wobble.
Additional Tips for Maintaining a Secure Ceiling Fan
To keep your ceiling fan secure, regularly check and tighten all fasteners, including blade mounting screws and brackets.
Make sure the blades are properly aligned and not warped, which helps prevent wobbling.
Keeping these components in good shape guarantees safe, quiet operation and extends your fan’s lifespan.
Regular Fastener Checks
Regular fastener checks are essential to keep your ceiling fan operating safely and quietly. By inspecting all fasteners every six months, you prevent loose screws and ensure the support brackets stay secure.
Use a screwdriver to tighten any loose screws on the ceiling fan blades and their brackets, making sure they’re snug without overtightening. Don’t forget to check the screw holes; clean out dust or debris to prevent stripping and guarantee a firm grip.
Also, examine the canopy screws and downrod bolts, as vibrations can loosen these fasteners over time. If you find any stripped or damaged fasteners, replace them immediately to maintain stability.
Regular fastener checks help keep your fan balanced, quiet, and safe for everyday use.
- Check for loose screws on blades and brackets
- Tighten screw holes after cleaning debris
- Replace damaged fasteners right away
Proper Blade Alignment
Ensuring your ceiling fan blades are properly aligned is essential for smooth operation and safety. Start by checking that each blade is level and at the same height from the ceiling to prevent wobbling caused by misalignment. Use a straightedge or level to verify that the blades are parallel and properly aligned.
Tighten all blade screws securely to the manufacturer-recommended torque to keep blades firmly attached and prevent loosening over time. Regularly inspect the blade pitch and adjust if necessary, following the manufacturer’s specifications, to maintain balance and reduce wobbling.
If you notice warped blades, replace them promptly to ensure proper alignment and even weight distribution. Proper blade alignment minimizes wobbling, prolongs fan life, and keeps operation smooth and safe.
When to Seek Professional Assistance

Knowing when to call a professional is essential for your safety and the proper functioning of your ceiling fan. If you notice persistent wobbling or strange noises after tightening the blades, it’s time to seek professional assistance.
Complex issues like improper mounting or electrical repairs can pose safety hazards if not handled correctly. A licensed electrician can diagnose and fix underlying problems, ensuring the fan is safely installed and secure.
Consider calling a professional if:
- Your ceiling fan is wobbling excessively despite blade tightening
- You suspect installation issues or improper mounting
- You experience ongoing strange noises or electrical concerns
Attempting repairs beyond your experience can lead to safety hazards, so don’t hesitate to get expert help when needed.
Frequently Asked Questions
How to Fix Wobbly Ceiling Fan Blades?
To fix wobbly ceiling fan blades, start by turning off the fan and securing the power.
Check each blade to guarantee it’s tightly attached to its bracket and that the brackets are solidly connected to the motor. Tighten any loose screws with a screwdriver.
If wobbling continues, inspect the blades for warping or damage and replace them if needed.
Cleaning the blades and using a balancing kit can also help stabilize your fan.
How to Tighten Blades on a Ceiling Fan?
To tighten blades on a ceiling fan, first turn off the fan and wait for the blades to stop moving.
Then, grab a Phillips-head screwdriver and tighten each screw securing the blades to the motor arm or blade brackets.
Make sure you tighten the screws in a crisscross pattern for even security.
Afterward, turn the fan on to check if the wobbling is reduced and the blades are secure.
How Do I Keep My Ceiling Fan Blades From Drooping?
Think of your ceiling fan blades as the wings of a bird—if they droop, flight becomes awkward. To keep them flying smoothly, regularly tighten the screws and brackets, ensuring they’re snug as a bug.
Use a level to keep them straight, replace warped blades, and make sure the downrod and hardware are secure.
Keep the blades clean; dust is like weight that makes their wings sag, hindering their graceful spin.
Why Is My Fan Wobbling While Spinning?
Your fan wobbles because the blades might be loose, warped, or unevenly installed. Check if the mounting screws are tight and make sure the blades are properly aligned.
Dust or debris buildup can also cause vibrations, so clean the blades regularly.
Over time, the motor or hardware can loosen, making the fan spin unevenly. Tightening the screws, balancing the blades, and cleaning them can help stop the wobbling.
Conclusion
By following these simple steps, you’ll have your ceiling fan spinning smoothly again in no time. Remember, loose blades can turn your cozy room into a chaotic wind tunnel faster than you can blink—so don’t delay! Regular maintenance keeps your fan running flawlessly and prevents costly repairs down the line. Stay vigilant, stay safe, and enjoy the invigorating breeze without the wobbling chaos. Your cool, quiet fan is just a few tightening turns away!