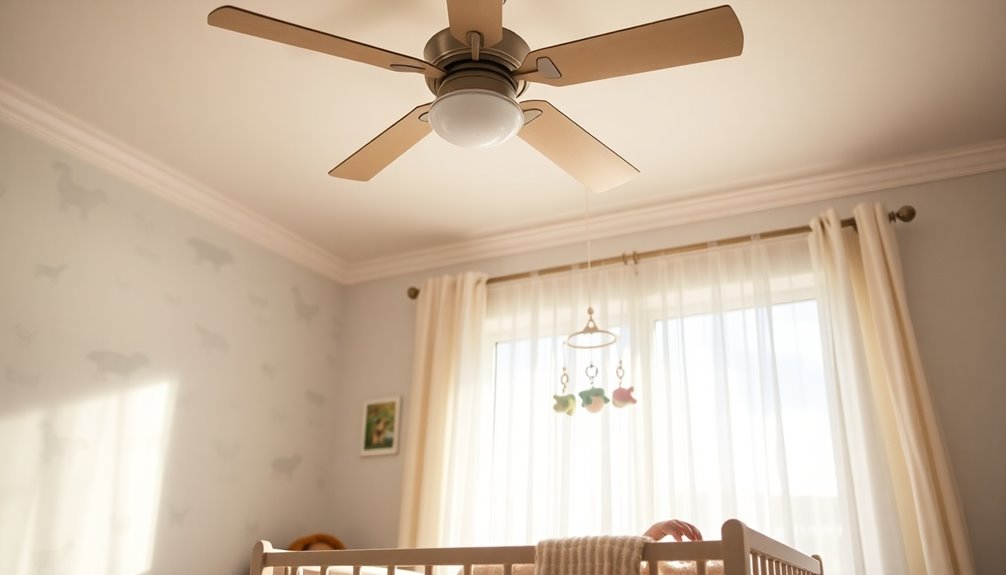
Installing a ceiling fan might feel intimidating at first, but it's manageable with some preparation and the right tools. Start by ensuring you have a fan-rated electrical box and verify your room size to select the right fan. Safety is key, so always turn off the power and wear safety gear. Once you've removed the old fixture, you'll mount the new fan, wire it up, and attach the blades. After a quick functionality test, you're set! If you want to understand the process in greater detail, keep going to uncover essential tips and techniques.
Key Takeaways
- Installing a ceiling fan requires basic electrical knowledge and tools, making it manageable for DIY enthusiasts.
- Proper measurements and ensuring a fan-rated electrical box are crucial for safety and compatibility.
- Following installation steps, including wiring and mounting, can be straightforward if instructions are closely adhered to.
- Safety precautions, such as turning off power and using a voltage tester, are essential to prevent accidents.
- Seeking help from a licensed electrician is advisable if you encounter uncertainties during the installation process.

Westinghouse 0110000 Saf-T-Brace for Ceiling Fans, 3 Teeth, Twist and Lock,Silver(Pack of 1)
Saf-T-Brace allows safe, simple installation of fans and fixtures
As an affiliate, we earn on qualifying purchases.
As an affiliate, we earn on qualifying purchases.
Types of Ceiling Fans

When choosing a ceiling fan, it's important to evaluate the various types available to guarantee you find the right fit for your space. Standard fans usually have a blade span ranging from 29 to 56 inches, making them perfect for average-sized rooms.
When considering room size, remember to calculate the recommended blade span by dividing the room's square footage by four to ascertain optimal airflow.
If your ceiling's height is 8 feet or lower, low-profile fans, also known as hugger fans, are ideal. They help maintain adequate airflow without hanging too low, which is vital for safety and comfort.
For outdoor areas like patios and porches, outdoor fans are specifically designed to withstand moisture and resist rust and corrosion, assuring durability.
Energy efficiency is another key factor. Energy Star-certified fans can reduce energy consumption by up to 30% compared to standard models, leading to significant savings on your utility bills.
Before you jump into ceiling fan installation, check your existing electrical box to verify it's compatible with the fan type you choose. Selecting the right type of fan can make a world of difference in your comfort and energy savings.

BELL PRCF57550BZ Ceiling Fan Electrical Box, Bronze, 4.75 in.
OUTDOOR ELEGANCE: Make your outdoor living spaces as comfy and classy as indoors. Our Hubbell TayMac Outdoor Ceiling…
As an affiliate, we earn on qualifying purchases.
As an affiliate, we earn on qualifying purchases.
Planning Your Installation

Before you plunge into installing your ceiling fan, it's crucial to plan your approach carefully. Start by measuring your room's size to choose a fan with the right blade span, typically between 29–56 inches. Verify that your ceiling fan will be mounted to a fan-rated electrical box, guaranteeing it can support the fan's weight and movement.
Next, consider the ideal height for installation. Position the fan 7–10 feet above the floor for effective air circulation and at least 8 inches from the ceiling to avoid obstruction. Check for any obstructions in the ceiling joists, like wiring or plumbing, that might interfere with your installation.
Gather the necessary tools, including a screwdriver, wire stripper, and ladder. Finally, familiarize yourself with local building codes, as they may require specific permits or dictate installation standards.
Here's a quick reference table to keep your planning organized:
| Task | Details | Importance |
|---|---|---|
| Measure Room Size | Choose appropriate fan size | Guarantees proper air circulation |
| Verify Electrical Box | Use fan-rated box | Supports fan's weight |
| Check Local Codes | Confirm installation requirements | Guarantees safety compliance |

haisstronica 8 IN 1 Self-Adjusting Wire Stripper Household Tool Kit, Professional Electrician Tool Set, Needle Nose Pliers, Screwdriver, Voltage Detector Pen, Knife, Insulating Tape, Wire Connectors
Professional Tools: This 8-in-1 hand tool set is perfect for household electrical repairs, everyday projects, and DIY tasks….
As an affiliate, we earn on qualifying purchases.
As an affiliate, we earn on qualifying purchases.
Safety Precautions to Follow

Installing a ceiling fan requires careful attention to safety precautions to avoid accidents and guarantee a smooth process.
First, always turn off power at the circuit breaker before starting any installation work. This step is essential to prevent electrical shock. Use a voltage tester to confirm that the power is truly off, making sure a safe working environment throughout the installation.
Next, wear safety goggles and gloves to protect against debris and potential electrical hazards while handling tools and fixtures. This simple step can make a significant difference in your safety.
Verify that the electrical box you're using is rated for ceiling fans. An improper box can lead to accidents or damage to the fan.
If you encounter any uncertainty regarding the electrical wiring, it's wise to consult a licensed electrician. They can provide guidance and guarantee compliance with local electrical codes and safety standards.
Following these safety precautions can help you complete your ceiling fan installation efficiently and safely, giving you peace of mind as you enjoy your new fan.
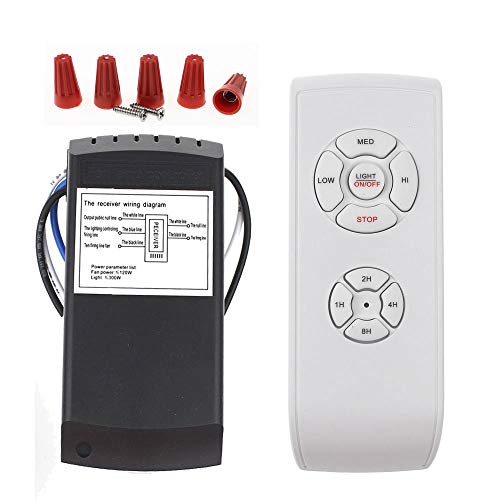
LPHUMEX Universal Ceiling Fan Remote Control Kit, 3-in-1 AC Motor Ceiling Fan Light Timing & Speed Remote, for Hunter/Harbor Breeze/Westinghouse/Honeywell/Other Ceiling Fan lamp
☞Easy Installation – Installation of the Universal Ceiling Fan Remote Controls Kit is a breeze, and the looks…
As an affiliate, we earn on qualifying purchases.
As an affiliate, we earn on qualifying purchases.
Removing the Old Fixture

Before you start, make sure the power's off at the circuit breaker to keep things safe.
Grab a voltage tester to confirm there's no electricity running to the fixture.
Once you've done that, you can proceed with removing the old fixture.
Safety Precautions First
Guaranteeing safety is vital when removing the old fixture, so start by turning off the power at the circuit breaker to prevent electrical shock. Once you've done that, grab a voltage tester to confirm that the power to the fan is indeed off. This step is essential; you don't want any surprises when you start working.
Next, as you carefully unscrew the mounting screws, handle the fixture gently to avoid damaging the junction box or any wiring. Pay attention to the wire connections: typically, you'll find black for hot, white for neutral, and green or bare for the ground wire. Noting these connections will help you when you install the new ceiling fan.
After you detach the fixture from the ceiling, cap any exposed wires with wire nuts for safety. This precaution guarantees that no live wires are left unprotected while you prepare for the new installation. Additionally, ensuring that you work in a clean environment can prevent any dust and debris accumulation that might interfere with your electrical connections.
Disconnecting Power Supply
Disconnecting the power supply is vital when you're ready to remove the old fixture. First, you need to turn off the circuit breaker dedicated to the room. This guarantees that no electricity is flowing to the existing fixture. Next, grab a voltage tester to confirm the power is indeed off. Once you're sure it's safe, carefully take out any light bulbs and shades to prevent breakage.
Here's a quick reference table for your disconnection process:
| Step | Action | Notes |
|---|---|---|
| 1. Turn Off Power | Switch off the circuit breaker | Verify it's the right breaker |
| 2. Confirm Power Off | Use a voltage tester | Test wires to confirm no voltage |
| 3. Remove Fixture | Unscrew and detach the existing fixture | Keep screws safe for reinstallation |
| 4. Disconnect Wiring | Unscrew wire connectors or cut wires | Note wire connections for new fan |
After detaching the fixture, take care to disconnect the wiring by unscrewing the wire connectors. Be sure to note the connections for the installation of your new ceiling fan. This step is vital for a safe and effective installation.
Proper Fixture Disposal
Carefully remove the old fixture to prepare for the installation of your new ceiling fan. First, verify you've turned off the power supply at the circuit breaker to prevent electrical shock.
Now, unscrew and detach the light fixture from the ceiling, supporting it as you remove it to avoid dropping it.
Once the fixture is removed, disconnect the wiring by unscrewing the wire nuts and gently pulling apart the connected wires. Keep track of their arrangement for future reference.
Inspect the wiring for any signs of damage or wear. If you see exposed wires, cap them with wire nuts for safety until your new fixture is ready to be installed.
Now, it's time to properly dispose of the old fixture. Check your local regulations, as some components may be recyclable or require special handling.
Separate any recyclable materials, and verify that you follow the guidelines to dispose of non-recyclable parts safely.
Installing the Electrical Box

When you're installing a ceiling fan, the first step is setting up the electrical box, which must be fan-rated to handle the weight and movement of the fixture.
If you're replacing an existing light, you'll need to remove the old box and check for compatibility with your new fan. A standard electrical box often won't suffice, so you may need to install a new fan-rated electrical box.
Make certain the box is securely fastened to a ceiling joist or a 2-by-4 wood brace. Use screws to prevent sagging or any risk of becoming loose over time.
Proper grounding is essential, so attach the ground wire to the grounding screw inside the box to minimize electrical hazards.
Before finalizing the installation, verify that the new electrical box is labeled for ceiling fan use. Non-rated boxes may not withstand the forces exerted by the fan during operation, leading to potential safety issues.
Mounting the Ceiling Fan

With the electrical box securely installed, you're ready to mount the ceiling fan. Start by taking the mounting bracket and positioning it over the junction box. Make sure it's centered, then use screws to secure it in place, following the manufacturer's guidelines closely for safety.
This bracket needs to handle the weight and movement of the fan, so verify it's firmly attached. Before securing the bracket completely, feed the fan wires through the center hole. This keeps your installation clean and organized.
If you're working with a flush mount fan, thread the wires through the top housing and canopy. For downrod fans, pull the wires through the downrod and canopy for proper attachment.
Once everything is in place, take a moment to check that the fan is level. Use a level tool to confirm stability, which is vital in preventing wobbling or noise during operation. Incorporating energy-efficient designs in your ceiling fan choice can enhance the overall efficiency of your home.
After confirming it's secure and level, you're well on your way to enjoying your newly mounted ceiling fan. Proper mounting sets the foundation for a successful installation, so don't rush this important step.
Wiring the Fan

How do you guarantee a safe and effective wiring process for your ceiling fan? First, make sure the power is off at the circuit breaker. Use a voltage tester to double-check that there's no electricity flowing before you begin wiring the fan.
Connect the fan's black wire to the household black wire, which is your power source. Next, attach the white wire to the white wire for the neutral connection. For safety, connect the green or bare copper ground wire to the ground wire in your ceiling.
If your ceiling fan includes light kit wires, follow the manufacturer's color coding for those connections. Once you've made the connections, secure them tightly with wire nuts.
It's vital to cover these connections with electrical tape to prevent any accidental disconnection. If you encounter non-standard wiring colors or feel uncertain at any point, don't hesitate to consult a licensed electrician for help. Additionally, following proper wiring techniques can help ensure a longer lifespan for your ceiling fan, similar to how best vacuums for dust removal are designed for superior performance and longevity.
Proper wiring is necessary not just for functionality but also for safety. Taking these steps guarantees your ceiling fan will operate smoothly and reliably.
Attaching Blades and Light Kit

Now that you've wired the fan, it's time to attach the blades and light kit.
Make sure you check the blade orientation for the best look, and securely fasten everything using the provided hardware.
Once the blades are on, you'll need to wire the light kit carefully, ensuring all connections are tight and safe.
Proper Blade Orientation
Proper blade orientation plays an essential role in your ceiling fan's efficiency and performance. To achieve ideal airflow, make sure that the fan blades are angled downwards in a "scoop" position during the summer. This setup pushes cool air down into the room.
In winter, simply reverse the blades to circulate warm air trapped near the ceiling.
When you attach the blades, follow the manufacturer's instructions carefully. Start all screws before tightening to guarantee an even fit and prevent wobbling during operation.
If your fan features reversible blades, decide which side you'll display before installation, as this affects both aesthetics and functionality.
If your fan includes a light kit, you'll want to handle it with care. While this section focuses on blade orientation, keep in mind that the light kit will require proper installation and wiring according to the provided diagrams in the installation manual.
Light Kit Wiring
Once the blades are securely attached, it's time to focus on wiring the light kit. First, verify that the power is turned off at the circuit breaker. Use a voltage tester to confirm there are no live wires.
Next, match the light kit wires to the fan wires according to the manufacturer's instructions: black to black for power, white to white for neutral, and ground (green or bare) to ground.
After connecting the wires, secure all wire connections with wire nuts, and reinforce them with electrical tape to prevent any accidental disconnections. This step is essential for safe operation and longevity of your ceiling fan.
Once everything is wired correctly, you can proceed to attach the fan. Make sure all screws are started before tightening to guarantee proper alignment.
After you've completed the installation, it's time for testing functionality. Turn the power back on and check if the light kit and fan operate as expected. Look for any wobbling or loose components, as these could indicate a need for further adjustments.
Following these steps will confirm your ceiling fan and light kit are installed safely and efficiently.
Secure Blade Attachment
Beginning with the fan blades, make sure you've got all the necessary hardware at hand for a secure attachment. Start by taking each blade assembly and positioning it on the fan motor. Use the hardware provided to securely mount each blade; make certain to start all screws before tightening. This allows for proper alignment, preventing wobbling once the fan is operational.
Don't forget to verify the orientation of reversible fan blades; the visible side should face the desired direction for ideal aesthetic appeal.
Once you've attached the fan blades, it's time for light kit installation. Thread the light kit wires through the fan's switch housing cover plate before making connections according to the provided wiring diagram.
After securing both the blade assemblies and light kit, double-check that all connections are tight and that no bare wires are exposed. This step is essential for guaranteeing safe operation, as loose connections can lead to electrical hazards.
Following these steps not only guarantees your ceiling fan operates smoothly but also looks great in your space!
Testing Your Installation

After you've completed the installation, you'll want to test your work to verify everything's functioning properly.
Start by restoring power at the circuit breaker and use a voltage tester to ascertain that the fan is receiving power safely. Next, test the fan operation by pulling the chain or using the remote control, checking all speed settings for smooth functionality.
Listen carefully for any unusual noises, such as wobbling or rattling, which may indicate that the fan blades aren't properly aligned or secured.
If your fan includes a light kit, confirm that all bulbs are working by turning on the lights and checking each one.
Finally, inspect all connections and the stability of the fan to validate it's securely mounted and safe for use. Make sure there are no loose wires or parts that could lead to future issues.
Once you've completed these checks, you can feel confident that your ceiling fan installation is a success and ready for everyday use. Enjoy the comfort and ambiance your new fan brings!
Frequently Asked Questions
Is It Hard to Install Your Own Ceiling Fan?
You might find installing your own ceiling fan to be a bit challenging, especially if you're not familiar with electrical work.
It requires some basic tools and a good understanding of wiring. If you're comfortable with DIY projects, you can manage it, but it'll take time—usually between 2 to 4 hours.
Just remember to check local building codes and use a fan-rated electrical box for safety.
Can the Average Person Install a Ceiling Fan?
Like a painter wielding a brush, you can transform your space with a ceiling fan installation.
The average person, equipped with basic electrical knowledge and essential tools, can certainly take on this task. With modern fans simplifying the process, you'll find it's a manageable project.
Just guarantee you prioritize safety by turning off the power and following instructions.
With patience and care, you'll create a cool breeze in your home.
Do You Need an Electrician to Install a New Ceiling Fan?
You don't necessarily need an electrician to install a new ceiling fan, but it often depends on your comfort level with electrical work.
If you've got basic skills and the proper tools, you can tackle the job yourself.
However, if the wiring looks complicated or you're unsure about safety, hiring a licensed electrician is a smart move.
They'll guarantee everything's installed correctly and up to code, giving you peace of mind.
What Is the Number One Concern When Installing a Ceiling Fan?
The number one concern when you install a ceiling fan is ensuring that the electrical box is rated to support the fan. If it's not, you risk the fan falling, which could cause serious injury or damage.
You should also make sure to secure the fan to a ceiling joist or a fan-rated brace.
Always turn off the power at the circuit breaker before you start, and follow the manufacturer's instructions for safety.
Conclusion
Installing a ceiling fan might seem like an intimidating task, but with the right preparation and a little know-how, you can turn your space into a breeze-filled oasis. Just as a fan spins to create comfort, your effort will pay off in the cool relief it brings. So roll up your sleeves, follow the steps, and embrace the challenge. You'll not only enhance your home but also gain a sense of accomplishment that'll keep you soaring high.