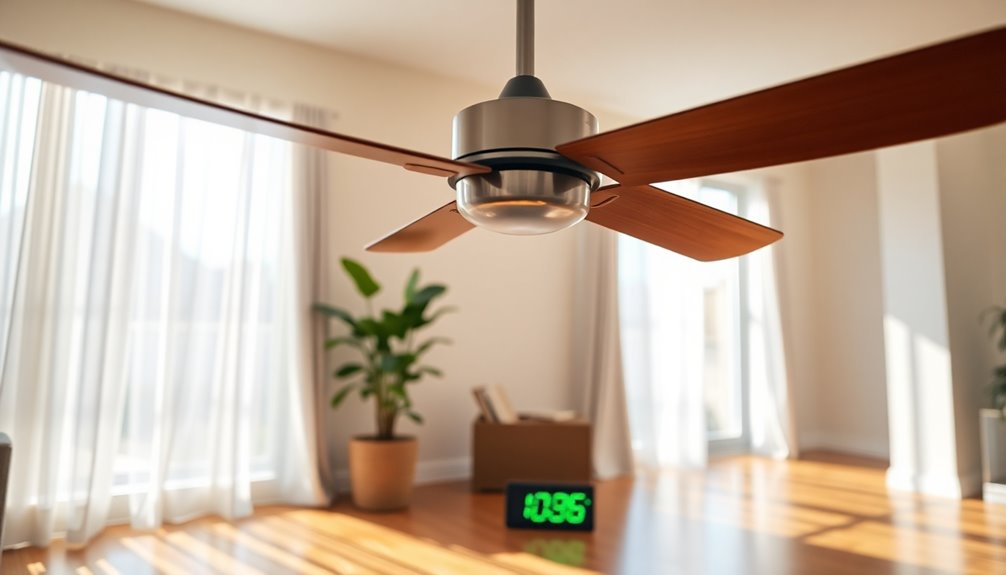
Installing a ceiling fan isn't as hard as it seems. With the right tools, like screwdrivers and a voltage tester, you can tackle it yourself. First, make sure your existing electrical box is fan-rated and turn off the circuit breaker to stay safe. Measure your room to select the proper fan size, and center the fan for ideal airflow. Follow the wiring connections carefully, ensuring everything's tight and secure. Once installed, test for smooth operation. Encountering challenges is normal, but with a bit of guidance, you can handle it. There's a lot more to discover about installation details!
Key Takeaways
- Installing a ceiling fan requires basic tools and skills, making it manageable for most DIY enthusiasts.
- Properly selecting the fan size based on room dimensions simplifies the installation process and enhances airflow.
- Ensuring electrical compatibility and following wiring instructions is crucial for safe installation and operation.
- Safety precautions, like turning off power and using a voltage tester, are essential to prevent electrical hazards.
- Testing the fan post-installation ensures it operates smoothly and meets safety standards, confirming a successful setup.

Westinghouse 0110000 Saf-T-Brace for Ceiling Fans, 3 Teeth, Twist and Lock,Silver(Pack of 1)
- Easy fan and fixture installation: Safe, simple setup for fans and fixtures
- Heavy-duty support capacity: Supports fixtures up to 150 lbs, fans up to 70 lbs
- Multiple knockout options: Includes 6 knockouts and 1 Romex connector
As an affiliate, we earn on qualifying purchases.
As an affiliate, we earn on qualifying purchases.
Benefits of Ceiling Fans

When it comes to keeping your home comfortable, ceiling fans offer several benefits that can enhance your living space. They effectively cool a room in the summer by creating a wind-chill effect, making the temperature feel up to 10 degrees cooler. This means you can set your thermostat a bit higher, which helps lower your energy bill.
In the winter, you can run your ceiling fan in reverse to distribute warm air that rises to the ceiling. This simple adjustment not only boosts your comfort but can also reduce heating costs. Additionally, using a ceiling fan in conjunction with an air purifier can further improve indoor air quality, especially by removing pollutants that affect health. Ceiling fans can also complement HEPA filtration systems by enhancing overall air circulation.
Installing a ceiling fan improves air circulation, making your rooms feel more inviting and comfortable, regardless of their size.
Moreover, Energy Star-certified ceiling fans use up to 60% less energy than traditional fans, leading to significant savings on electricity bills. By circulating air throughout your home, ceiling fans enhance your HVAC system's efficiency, ensuring a more consistent temperature in every room. Additionally, many modern ceiling fans come with smart home compatibility, allowing for effortless control and customization of airflow.
Whether you're cooling off in the summer or spreading warmth in the winter, ceiling fans are a smart and stylish addition to your home.
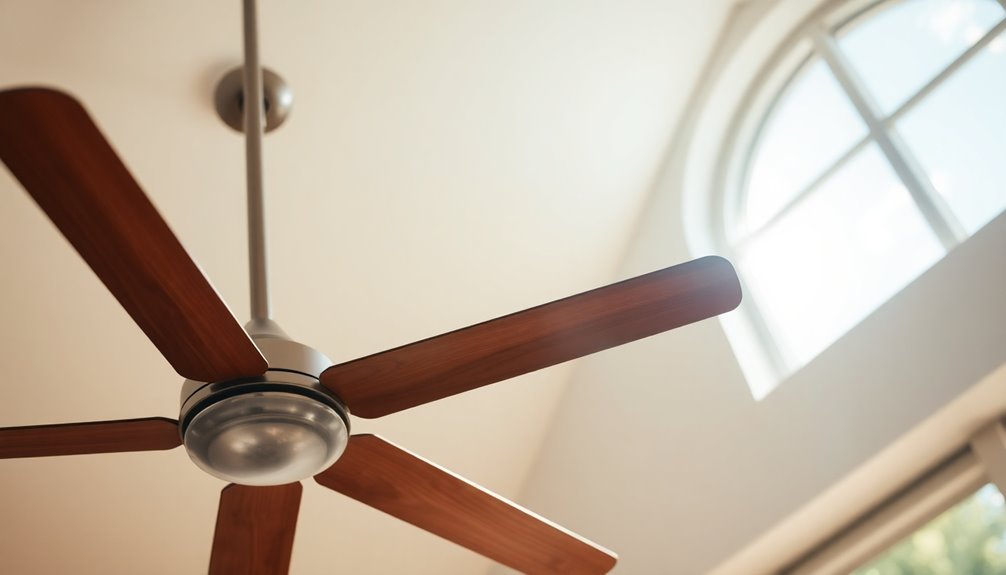
Selecting the Right Size

When you're picking a ceiling fan, size matters.
For rooms under 12 feet, a 36-inch fan works best, while larger spaces need bigger fans to keep air flowing.
Understanding the recommended blade span based on your room's dimensions will help you make the right choice.
Room Dimension Guidelines
Choosing the right size ceiling fan for your room can greatly impact comfort and airflow. For rooms with a largest dimension under 12 feet, a 36-inch fan is your best bet. This size guarantees ideal airflow without overwhelming the space. Additionally, using a properly sized fan can lead to significant energy savings in your overall utility costs.
If your room measures between 12 to 15 feet, a 42-inch fan will provide adequate circulation for medium-sized areas.
For larger rooms, specifically those measuring 15 to 18 feet, you'll want to go for a 52-inch fan to effectively move air and maintain comfort levels.
If you have a particularly large or long narrow room, consider installing two smaller fans instead of one large fan. This approach enhances air circulation and creates a more balanced airflow throughout the space.
To determine the recommended size for your ceiling fan, divide your room's square footage by four. This will give you a solid guideline for selecting the perfect fan size, guaranteeing efficient performance and comfortable installation. Additionally, modern fans with Energy Star certification can significantly improve energy efficiency while maintaining optimal airflow.
Blade Span Recommendations
Choosing the appropriate blade span for your ceiling fan is essential to attaining ideal airflow and comfort in your space. The right blade span not only enhances air circulation but also complements your room size effectively. Here's a quick guide to help you choose the correct size:
| Room Size | Recommended Blade Span |
|---|---|
| Under 12 feet | 36-inch |
| 12 to 15 feet | 42-inch |
| 15 to 18 feet | 52-inch |
| Larger or long narrow | Two smaller fans |
For rooms under 12 feet in their largest dimension, a 36-inch fan is your best bet for maximum airflow. If your room measures between 12 to 15 feet, go for a 42-inch fan to guarantee balanced air circulation. In spaces that range from 15 to 18 feet, a 52-inch fan is ideal for adequate coverage and comfort. For larger or long narrow rooms, consider ceiling fan installation of two smaller fans to effectively distribute air throughout the space. Using these recommendations will make your ceiling fan installation seamless and effective.
Preparing for Installation

Before you start installing your ceiling fan, measure the room to guarantee you choose the right size for ideal airflow.
Gather the necessary tools, like a screwdriver and pliers, to make the process smoother.
Finally, check that your electrical box can support the fan to keep everything safe and secure.
Measure Room Size
Measuring your room size is essential for selecting the right ceiling fan. Start by determining the room's largest dimension. This will guide you in choosing a fan that fits perfectly.
For rooms under 12 feet, a 36-inch fan works well; for spaces between 12 to 15 feet, opt for a 42-inch fan; and for rooms from 15 to 18 feet, a 52-inch fan is ideal.
To guarantee maximum airflow, calculate the recommended blade span by dividing the room's square footage by 4. If you have a large or long and narrow space, consider using two smaller fans instead of one large fan in the room to enhance air circulation effectively.
When installing, center the fan directly in the room for the best air distribution and keep at least 1.5 feet from walls to avoid airflow obstruction.
Additionally, confirm that the fan mounting bracket is compatible with your ceiling height. This alignment won't only improve comfort during both cooling and heating seasons but also prevent inefficiencies, guaranteeing you get the most out of your ceiling fan.
Gather Necessary Tools
To kick off your ceiling fan installation, gather the essential tools you'll need. First, grab both a flathead and Phillips screwdriver. These will help you secure the fan and its components in place.
Next, a wire stripper/cutter is vital for preparing and connecting the wires properly. This tool guarantees that your electrical connections are secure and safe.
Don't forget a voltage tester. It's important to confirm that the power is off before you begin any electrical work. This step assures your safety during the installation process.
A stable ladder or step stool is also necessary, allowing you to reach the ceiling comfortably and safely while you work.
Before you start, make sure you have all the components from the ceiling fan kit, including the fan blades, motor, and mounting bracket. Having everything organized will make the installation process smoother and more efficient. Additionally, ensure that you choose a fan suitable for your room size to maximize airflow efficiency.
By preparing these tools and components beforehand, you'll set yourself up for a successful ceiling fan installation, making the task a whole lot easier.
Now that you've gathered everything, you're ready to jump into the installation!
Check Electrical Compatibility
Verifying your ceiling fan's electrical compatibility is vital for a successful installation. Start by checking the existing light fixture to confirm that the electrical box is fan-rated, meaning it can support the weight and movement of the fan.
Next, inspect the wiring in the ceiling. You should see a black wire (hot), a white wire (neutral), and a bare copper wire (ground). Make certain these match the requirements of your ceiling fan.
Don't forget to check the circuit breaker. You'll need to verify that the electrical supply for the room can handle the additional load of the ceiling fan. If you're unsure, consult an electrician to avoid any issues.
Before you begin the installation, use a voltage tester to verify there's no power running through the wires. This step is vital for your safety.
If your fan will be controlled by a wall switch, make sure that switch is compatible with the fan's wiring requirements to guarantee proper functionality. By taking these precautions, you'll set yourself up for a smooth and safe ceiling fan installation.
Safety Precautions to Follow

Before diving into your ceiling fan installation, it is vital to prioritize safety. Start by turning off the power at the circuit breaker to prevent electrical shocks. After that, use a voltage tester to confirm that the power is completely off at the wires you'll be working with. This step is significant for your safety.
Next, make certain to wear safety goggles and gloves to protect yourself from debris and any electrical hazards during the installation process. It is also important to mount your ceiling fan to a fan-rated electrical box. This guarantees it can support the fan's weight and prevents accidents down the line. Additionally, ensure that you maintain recommended distances between the fan and combustible materials, similar to the clearances from combustibles required for safe wood stove installation.
When you're ready to connect the wires, secure all wire connections with wire nuts and electrical tape. This will help avoid exposed wires, which can lead to short circuits or fire hazards.
Here's a quick reference table of safety precautions:
| Precaution | Description |
|---|---|
| Turn Off Power | Always switch off at the circuit breaker |
| Use a Voltage Tester | Confirm power is off before starting |
| Wear Safety Gear | Goggles and gloves are a must |
| Secure Wire Connections | Use wire nuts and tape to prevent hazards
Removing the Old Fixture

With safety measures in place, you can move on to removing the old fixture. First, verify the power's off at the circuit breaker and double-check with a voltage tester.
Once you're sure it's safe, carefully detach the existing light fixture. Start by unscrewing the mounting screws holding it in place, then gently pull it away from the ceiling. Be cautious to avoid damaging the wiring.
As you remove the old fixture, take note of how the wires are connected. You'll typically see:
- Black (hot) wire
- White (neutral) wire
- Green or bare copper (ground) wire
Inspect the wiring closely for any damage or wear. If you find any exposed wires, cap them with wire nuts for safety. This step is essential as you prepare for the new ceiling fan installation.
Finally, remember to dispose of the old fixture properly—remove any light bulbs and recycle or discard them per local regulations. By following these steps for removing the old fixture, you'll set a solid foundation for your new ceiling fan.
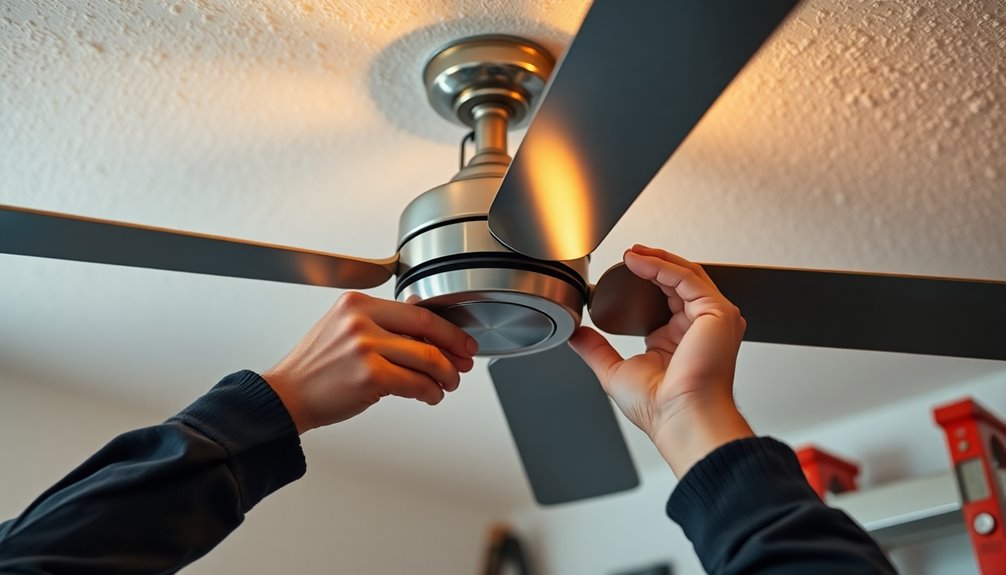
Mounting the Ceiling Fan

When mounting your ceiling fan, it's essential to use proper techniques to guarantee it's securely attached and safe.
Make sure you're working with a fan-rated electrical box and follow the manufacturer's instructions closely. This will help you avoid any issues with stability or electrical safety once the fan is in place.
Proper Mounting Techniques
Properly mounting a ceiling fan is essential for guaranteeing its safety and performance. To achieve this, start by using a fan-rated electrical box that can handle the fan's weight. This step helps prevent any damage or accidents down the line.
Next, choose a mounting bracket specifically designed for ceiling fans, as it offers extra stability compared to standard light fixture options.
Here are some key points to remember during the installation:
- Secure the mounting bracket to a ceiling joist or support beam for peak stability.
- Confirm the fan is at least seven feet above the floor for proper clearance.
- Keep the fan centered and at least 1.5 feet away from walls to maximize airflow.
When attaching the fan motor assembly to the mounting bracket, follow the manufacturer's guidelines closely. Make sure all screws are tightened, and connections are secure before you proceed.
Taking these proper mounting techniques into account won't only enhance your fan's performance but also guarantee a safe installation, allowing you to enjoy a cool breeze without worry.
Ensuring Electrical Safety
Mounting your ceiling fan correctly sets the stage for a safe installation, but confirming electrical safety is the next essential step. Before you start, always turn off the power at the circuit breaker to prevent electrical shock. Use a voltage tester to verify the power to the light is completely off before touching any wires coming from the ceiling.
Make sure your ceiling fan is mounted to a fan-rated electrical box, designed to support the weight and motion of the fan.
When it's time to connect the wires, match the fan wires—typically black, white, and green—to the corresponding household wires: hot, neutral, and ground. This step is critical for maintaining proper electrical function and safety.
Once you've connected the wires, secure them with wire nuts and wrap them with electrical tape. This prevents exposed wires and guarantees everything is safely contained within the junction box.
Wiring Connections Explained

Connecting the wires for your ceiling fan is an essential step that can seem intimidating if you're unfamiliar with electrical work. Understanding the color scheme and proper connections will make the process smoother.
Generally, you'll find the following wires:
- Black wire: This is your hot wire for the fan.
- White wire: This serves as the neutral wire.
- Green or bare copper wire: This is your ground wire.
If your ceiling has a red wire, it's typically for a separate light fixture. You can connect this to the blue wire from the fan if you're using a light kit.
Before making any connections, verify you identify which hot wire (black or red) controls your fan or lights with a non-contact voltage tester.
Secure all wire connections using wire nuts or Wago lever nuts to avoid exposed splice points that could lead to electrical hazards.
Once you've made the connections, carefully push all wires back into the junction box to keep everything neat and prevent interference with the fan assembly.
This attention to detail will enhance your ceiling fan installation experience.
Final Assembly Steps

Once you've secured your wiring connections, you can move on to the final assembly steps of your ceiling fan installation.
Start by loosening the mounting screws on the bracket to guarantee a secure fit when lifting the fan assembly into place. Carefully position the fan over the mounting bracket and tighten those screws to maintain stability and prevent any wobbling.
Next, it's time to attach the blades. Follow the manufacturer's instructions closely, making sure each blade is securely fastened to the motor assembly with the screws provided. This step is essential for the fan's overall performance and stability.
After attaching all the blades, double-check for stability and proper alignment. You want to confirm that your fan is level and securely mounted to avoid any issues later on.
Finally, restore power to the circuit and connect the light switch. With everything in place, you can now enjoy your newly installed ceiling fan.
Just remember to check its functionality, including speed settings and any light fixtures, to confirm everything works smoothly before completing the installation.
Testing the Installed Fan

Testing your newly installed ceiling fan is essential to guarantee it operates efficiently and safely. Once you've restored power, use the pull chain or remote control to turn on the fan. Check how it runs at all speed settings, making sure it operates smoothly.
Here's what to keep an eye on during testing:
- Wobbling fan blades: If you notice any wobbling, it may indicate misalignment or loose blades. Tighten the screws or reposition the blades as needed.
- Light bulbs: If your fan includes lights, flip the wall switch to turn them on and verify they illuminate properly.
- Unusual noises: Listen carefully while the fan operates. Any strange sounds could signal installation issues that require your attention.
To further guarantee safety, use a voltage tester to confirm all wiring connections are secure and that there's no electrical current at exposed splices.
Common Installation Challenges

When installing a ceiling fan, you might quickly encounter several common challenges that can complicate the process. One of the most significant hurdles is ensuring your ceiling fan is mounted on a fan-rated electrical box. This is essential for safety and stability. Additionally, sizing the fan correctly for your room is important; a fan that's too small will underperform, while one that's too large may create noise issues.
Achieving the right height during installation is also necessary. Aim for a clearance of 7–10 feet from the floor and at least 8 inches from the ceiling. Wiring can be tricky too; matching the fan wires with your household wiring is necessary for functionality. Finally, be prepared to navigate obstacles such as joists or plumbing, which may require extra tools or planning. It's also important to consider the energy-efficient models available, which can significantly reduce overall energy consumption.
| Challenge | Solution | Tips |
|---|---|---|
| Electrical box support | Use a fan-rated box | Check weight ratings |
| Proper sizing | Measure room dimensions | Consult fan sizing charts |
| Wiring connections | Match fan wires accurately | Color-code for easy reference
Frequently Asked Questions
Is It Hard to Install Your Own Ceiling Fan?
Installing your own ceiling fan isn't necessarily hard, but it does require some basic electrical knowledge and the right tools.
You'll need to choose the right fan size for your space and guarantee you have a sturdy electrical box. Safety's key, so always turn off the power first.
Can the Average Person Install a Ceiling Fan?
Imagine trying to fix a smartphone without any instructions—frustrating, right?
But when it comes to installing a ceiling fan, you've got the tools and guidance to succeed. With the right preparation, including a ladder, screwdrivers, and the fan's manual, you can tackle this project.
Just remember to turn off the power and use a voltage tester for safety. In one to two hours, you'll have your new fan spinning and your room refreshed!
Do You Need an Electrician to Install a New Ceiling Fan?
You mightn't need an electrician to install a new ceiling fan if you have basic electrical knowledge and the right tools.
Many fans come with easy-to-follow instructions.
However, if you're uncomfortable with electrical work or if the installation requires new wiring or modifications, hiring a licensed electrician is a smart choice.
It guarantees safety, compliance with local codes, and peace of mind, especially if your existing electrical setup isn't fan-rated.
How Much Should I Expect to Pay to Have a Ceiling Fan Installed?
You might think hiring an electrician's too expensive, but consider it a worthwhile investment.
Expect to pay between $100 and $300 for professional installation, depending on complexity and local rates. If you need extra electrical work, like a new junction box, costs can rise.
Alternatively, DIY saves money, with fan kits ranging from $50 to $300, though you'll need some electrical know-how.
Don't forget about store installation services, typically costing $75 to $150.
Conclusion
Installing a ceiling fan might seem like climbing a mountain, but with the right tools and steps, you'll find it's more like a gentle stroll through the park. You've embraced the benefits, tackled the challenges, and now, with a flick of the switch, you can feel the cool breeze dance around your room. So, grab your toolkit and let your ceiling fan take flight—transforming your space into a haven of comfort and style!