
To safely install a bathroom ceiling fan, first verify that your ceiling can support the weight by locating ceiling joists and reinforcing the drywall as needed. Turn off power, confirm with a voltage tester, and connect wiring according to manufacturer instructions, guaranteeing proper grounding and GFCI protection. Vent directly outdoors using a smooth, straight duct with a damper to prevent backdrafts. For detailed steps to ensure ideal safety and ventilation, explore further guidance.
Key Takeaways
- Ensure the ceiling structure can support the fan and securely mount it to solid joists or reinforced drywall.
- Turn off power, verify wiring is proper, and use GFCI-protected circuits to ensure electrical safety in damp environments.
- Vent the fan directly outdoors with a short, straight duct and a damper-installed vent cap to prevent backdrafts and pests.
- Confirm the fan is rated for bathroom moisture levels and that electrical components are UL-listed for damp or wet locations.
- Test fan operation for noise and airflow, and perform regular maintenance like cleaning blades and inspecting ductwork for safety.
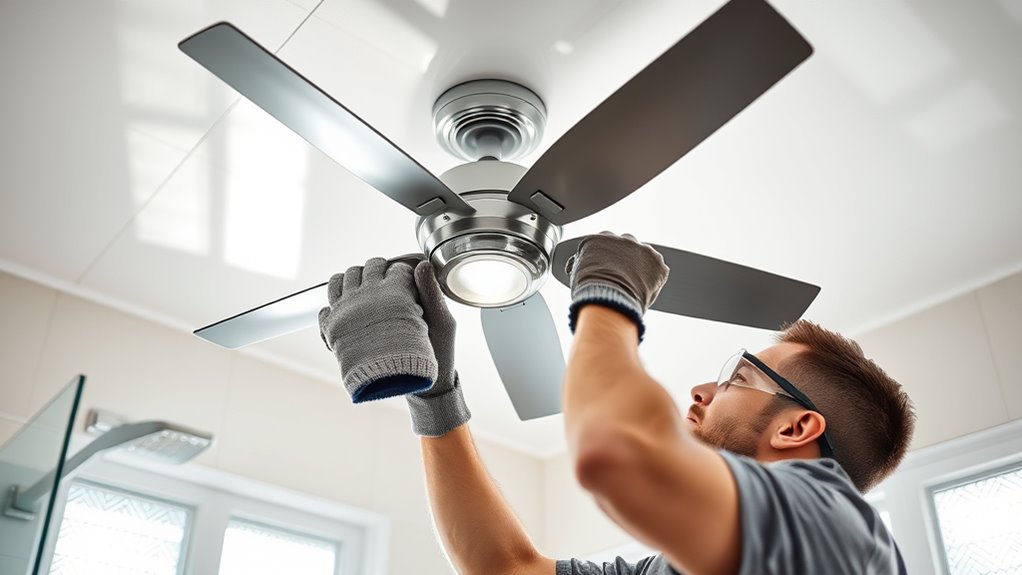
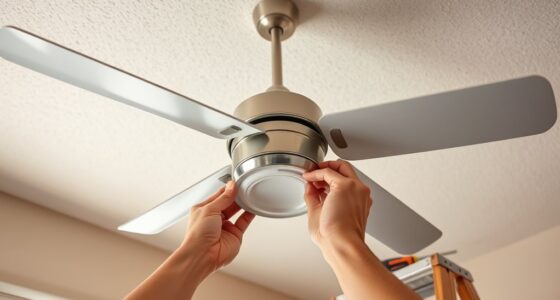
Are you considering installing a ceiling fan in your bathroom to improve ventilation and reduce humidity? Proper installation requires careful attention to electrical safety, structural integrity, and compliance with local building codes. First, assess the ceiling structure to confirm it can support the weight of the fan. Use a stud finder or joist locator to identify the ceiling joists, ensuring the fan is mounted securely to a solid surface. If your ceiling is drywall, reinforce it with a mounting brace or electrical box rated for fan installation. Standard electrical boxes are insufficient because they may fail under the fan’s weight or vibration, increasing safety risks. Choose a UL-listed fan model designed specifically for bathroom use, ensuring it’s rated for damp or wet locations, which provides protection against moisture exposure.
Ensure your bathroom ceiling can support a fan by securely mounting it to sturdy joists or reinforced drywall.
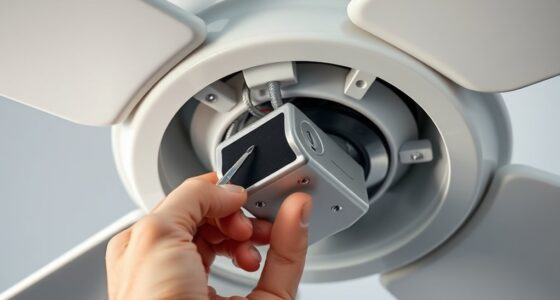
Electrical wiring must be handled with precision. Turn off the main power supply before beginning any work to prevent electrocution. Verify power is disconnected using a voltage tester. Use a grounded, GFCI-protected circuit to supply the fan, as GFCI (Ground Fault Circuit Interrupter) protection is mandated in bathrooms due to the high moisture levels. The wiring should be connected following the manufacturer’s instructions, ensuring proper grounding and secure connections with wire nuts. Use wire connectors rated for damp environments and avoid exposed wiring. Properly route the wiring through conduit or appropriate protective coverings to prevent damage or deterioration over time. Additionally, consult local electrical codes and standards to ensure full compliance.
Ventilation considerations are critical. You must confirm the fan’s airflow capacity, measured in cubic feet per minute (CFM), is suitable for your bathroom size. A general rule is 1 CFM per square foot of space, but larger or more humid bathrooms may require a higher capacity unit. The fan must be vented directly outdoors via an exterior wall or roof vent, not into the attic or other enclosed spaces, to prevent moisture buildup and mold growth. The vent duct should be as short and straight as possible, with smooth interior surfaces to maximize airflow efficiency. Use a vent cap with a damper to prevent backdrafts and pests.
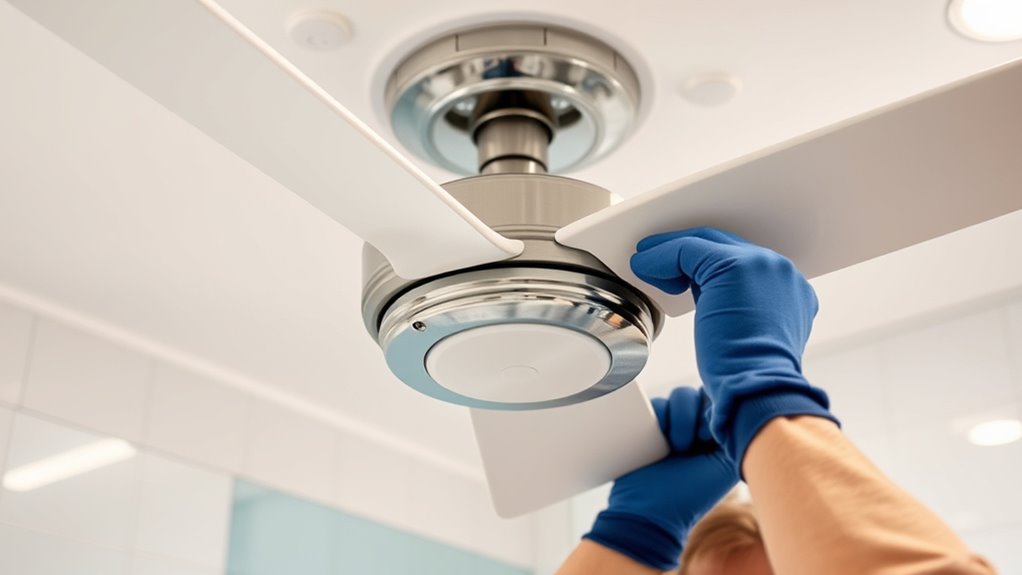
Finally, ensure the fan is installed level and securely fastened to the ceiling. After installation, test the operation for noise, vibration, and proper airflow. Confirm the switch wiring functions correctly and that the fan turns on and off reliably. Regular maintenance, including cleaning the blades and inspecting the ductwork, is necessary to keep ventilation excellent and prevent potential safety hazards. Proper installation, with meticulous attention to structural, electrical, and ventilation details, guarantees safe operation and effective moisture control in your bathroom. Incorporating digital literacy into your home improvement projects can also streamline troubleshooting and upgrade processes over time.

Broan-Nutone® Bathroom Exhaust Fan, 50 CFM Modern Grille, Energy Star Fan, 2.0 Sones
50 CFM BATHROOM EXHAUST FAN: 50 CFM is sufficient ventilation to remove, moisture, odor and pollutants from your…
As an affiliate, we earn on qualifying purchases.
As an affiliate, we earn on qualifying purchases.
Frequently Asked Questions
Can I Install a Ceiling Fan Without a Dedicated Bathroom Circuit?
You shouldn’t install a ceiling fan in your bathroom without a dedicated circuit. Combining the fan with other bathroom or general circuits can overload the wiring, creating safety hazards. Local electrical codes require a separate circuit for bathroom fans to prevent electrical faults and ensure proper ventilation. Always consult a licensed electrician before proceeding to verify compliance and guarantee safe installation, avoiding potential damage or safety risks.
How Often Should Bathroom Ceiling Fans Be Cleaned and Maintained?
You should clean and maintain your bathroom ceiling fan every six months to keep it running smoothly. Regularly check for dust buildup on blades and motor components, which can cause imbalance or noise. Use a damp cloth for blades and a vacuum with a brush attachment for vents. This routine prevents moisture-related issues and extends the fan’s lifespan, ensuring ideal ventilation and safety, as neglect can lead to bigger problems down the road.
Are There Specific Safety Certifications to Look for in Bathroom Fans?
You should look for bathroom fans with UL (Underwriters Laboratories) or ETL (Intertek) safety certifications, as these confirm compliance with safety standards. These certifications indicate the fan has been tested for electrical safety, fire resistance, and durability. Confirm the product label explicitly states these marks, and verify the fan’s rated for damp or wet locations. Choosing certified fans minimizes electrical hazards and ensures reliable operation in moisture-rich environments.
Can a Ceiling Fan Be Installed in a Small or Low-Ceiling Bathroom?
A ceiling fan can be installed in a small or low-ceiling bathroom if you choose a compact, low-profile model. Measure your ceiling height carefully; ideally, you want at least 7 feet of clearance. Use a flush-mount or hugger-style fan to maximize space and guarantee proper airflow without crowding the room. Always verify that the fan’s installation instructions specify suitability for low ceilings to avoid safety hazards.
What Is the Typical Lifespan of a Bathroom Ceiling Fan?
A bathroom ceiling fan typically lasts between 10 to 15 years with proper maintenance. Your fan’s lifespan depends on factors like usage frequency, humidity levels, and quality. Regularly clean the blades and motor to prevent dust buildup, and guarantee proper electrical connections to avoid overheating. Replacing the fan at the end of its lifespan ensures continued safety, effective ventilation, and energy efficiency, reducing the risk of mold and moisture damage.

Amico Bathroom Exhaust Fan, 1.0 Sones, 80 CFM, Low Noise, Ceiling Mounted Retrofit Ventilation Fans, 4 Inch Duct, No Attic Access Needed- UL Certified
Dimensions and Fit: Housing size 7.5 x 7.2 x 4 inches; Grille cover measures 9.4 x 8.6 inches;…
As an affiliate, we earn on qualifying purchases.
As an affiliate, we earn on qualifying purchases.
Conclusion
Just as Daedalus crafted his labyrinth with precision, installing your bathroom ceiling fan demands careful attention to safety and ventilation. By following proper electrical codes and ensuring correct placement, you create a secure, efficient system that minimizes mold and humidity issues. Remember, neglecting these steps risks compromising your home’s integrity—akin to Icarus flying too close to the sun. Prioritize meticulous installation for long-lasting performance and a healthier, more comfortable bathroom environment.

Broan-NuTone 4-Inch Flexible Wall Ducting Kit and Three-Rocker Switch for Bathroom Exhaust Fan, White
DUCTING KIT: 9-piece kit includes everything you'll need for replacing your exhaust fan's ducting
As an affiliate, we earn on qualifying purchases.
As an affiliate, we earn on qualifying purchases.
Broan-Nutone® Bathroom Exhaust Fan, 50 CFM Modern Grille, Energy Star Fan, 2.0 Sones
50 CFM BATHROOM EXHAUST FAN: 50 CFM is sufficient ventilation to remove, moisture, odor and pollutants from your…
As an affiliate, we earn on qualifying purchases.
As an affiliate, we earn on qualifying purchases.